

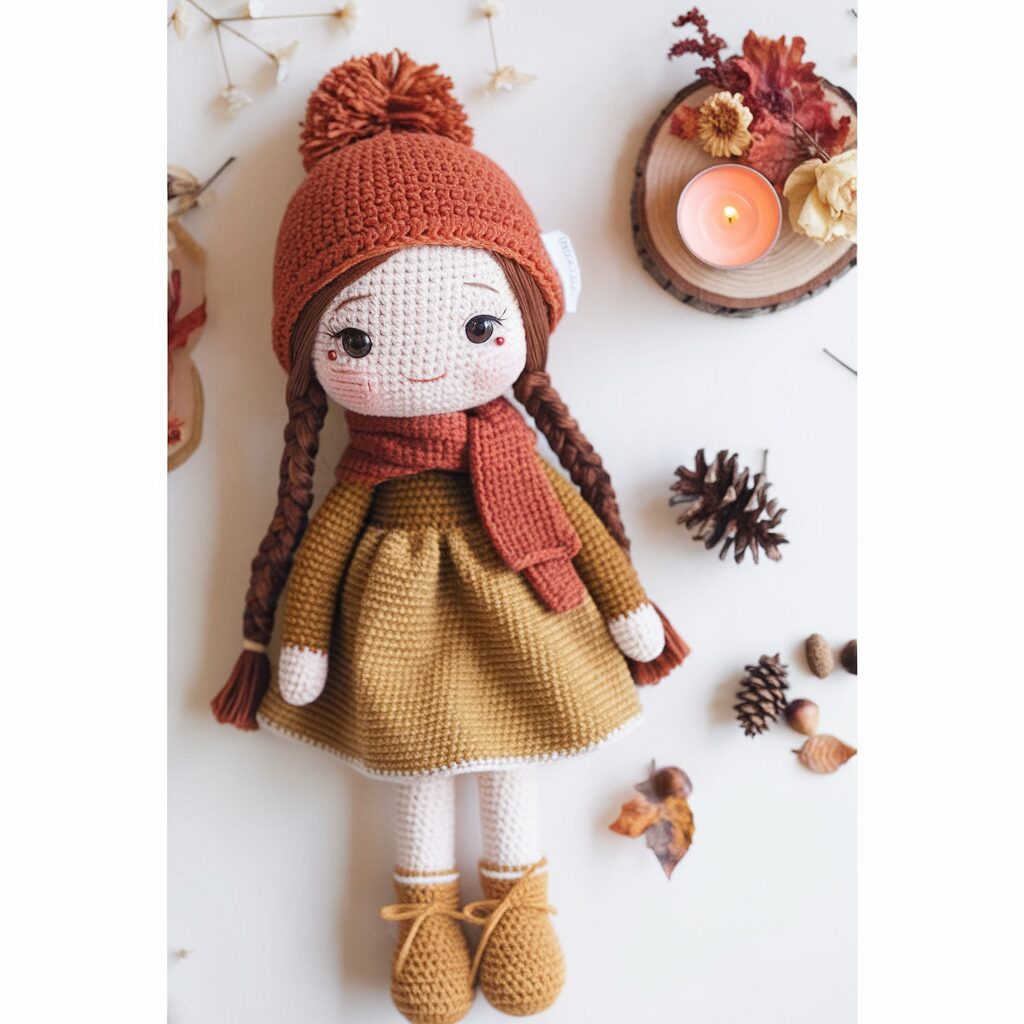
Ready to make the cutest little doll ever? This Adorable Girl in Yellow Dress pattern is perfect whether you’re just starting out or have been crocheting forever. With simple stitches and easy-to-find materials, you’ll create a sweet poseable doll that’s guaranteed to make everyone smile. Perfect for gifting or keeping for yourself – let’s get hooking!
Grab your hooks and yarn, crafters! I’m so excited to share this charming little doll pattern with you today. If you’ve been searching for a cute amigurumi project that’s both satisfying to make and absolutely adorable, you’re in the right place. This sweet girl with her bright yellow dress has become one of my most requested patterns, and I just know you’re going to love making her. The best part? She works up surprisingly quickly, using basic stitches that even newer crocheters can handle with confidence.
let’s get started!
Note
Materials Selection – For best results, use worsted weight yarn in turmeric yellow for the dress, skin tone for the body/head, brown for the hair, orange for the hat/scarf, and white for shoe details. Select safety eyes that are proportional to the head (install between rounds 22-23).
Hair Technique Tips – When creating the hair, cut 40 pieces of brown thread at 50cm each. The middle part hairstyle with braids requires careful placement – start from round 7 at the top of the head and secure ends 4 rows below the eyes for the perfect framing effect.
Assembly Order Matters – Complete all individual pieces first, then follow this assembly sequence for easiest construction: dress the body with the yellow outfit first, then attach the head, add hair details, and finish with accessories (hat and scarf). This prevents awkward handling of the doll during final steps.
Materials Needed:
- Worsted weight yarn in turmeric yellow (for dress and legs)
- Skin-colored yarn (for head, body, and hands)
- Brown yarn (for hair)
- White yarn (for shoe details)
- Orange yarn (for hat and scarf)
- Crochet hook size suitable for your yarn (typically G/4.0mm)
- Safety eyes (to install between rounds 22-23)
- Stuffing material
- Yarn needle for sewing and embroidery details
- Small piece of cardboard (for foot bottoms)
- Stitch markers
- Scissors
- White, brown, and skin-colored embroidery thread (for facial features)
- Pompom maker or cardboard templates for hat pompom
Abbrevations:
- sc = single crochet
- inc = increase
- dec = decrease
- dc = double crochet
- ch = chain stitch
- sp = spaces
- hdc = half double crochet
- ss = slip stitch
Head of the Adorable Girl in Yellow Dress
Creating the Perfect Doll Head: Step-by-Step Instructions
Head Instructions (Using Skin-Colored Yarn)
The head is the most expressive part of your amigurumi doll and requires careful attention to detail. This section will guide you through creating a perfectly shaped head with adorable facial features that bring your doll to life!
Creating the Basic Head Shape
Begin with skin-colored yarn to form the foundation of your doll’s sweet face:
Starting and Increasing Rounds:
- Round 1: Create 6 single crochet (sc) in a magic ring (MR)
- Round 2: Increase (inc) in each stitch = 12 stitches total
- Round 3: Alternate (1 sc, 1 inc) six times = 18 stitches total
- Round 4: Pattern of (2 sc, 1 inc) repeated six times = 24 stitches total
- Round 5: Pattern of (3 sc, 1 inc) repeated six times = 30 stitches total
- Round 6: Pattern of (4 sc, 1 inc) repeated six times = 36 stitches total
- Round 7: Pattern of (5 sc, 1 inc) repeated six times = 42 stitches total
- Round 8: Pattern of (6 sc, 1 inc) repeated six times = 48 stitches total
- Round 9: Pattern of (7 sc, 1 inc) repeated six times = 54 stitches total
- Round 10: Pattern of (8 sc, 1 inc) repeated six times = 60 stitches total
- Round 11: Pattern of (19 sc, 1 inc) repeated three times = 63 stitches total
Shaping the Face and Cheeks:
- Rounds 12-23: Work 63 sc in each round to form the face (12 rounds total)
- Round 24: 10 sc, then (1 inc, 2 sc) repeated eight times, followed by 29 sc = 71 stitches total
- Rounds 25-28: Work 71 sc in each round (4 rounds total)
Pro Tip: This is the perfect time to install the safety eyes! Position them between Rounds 22 and 23 for the most natural look. Make sure they’re evenly spaced for a symmetrical face.
Decreasing to Complete the Head
After installing the eyes, begin decreasing to shape the lower part of the head:
- Round 29: 10 sc, then (1 decrease (dec), 2 sc) repeated eight times, followed by 29 sc = 63 stitches
- Round 30: Pattern of (19 sc, 1 dec) repeated three times = 60 stitches total
- Round 31: Pattern of (4 sc, 1 dec, 4 sc) repeated six times = 54 stitches total
- Round 32: Pattern of (7 sc, 1 dec) repeated six times = 48 stitches total
- Round 33: Pattern of (3 sc, 1 dec, 3 sc) repeated six times = 42 stitches total
- Round 34: Pattern of (5 sc, 1 dec) repeated six times = 36 stitches total
- Round 35: Pattern of (2 sc, 1 dec, 2 sc) repeated six times = 30 stitches total
- Round 36: Pattern of (3 sc, 1 dec) repeated six times = 24 stitches total
- Round 37: Pattern of (1 sc, 1 dec, 1 sc) repeated six times = 18 stitches total
Finish with a slip stitch, then weave in the end to conceal it. Fill the head with stuffing, making sure it’s firm but not overstuffed.
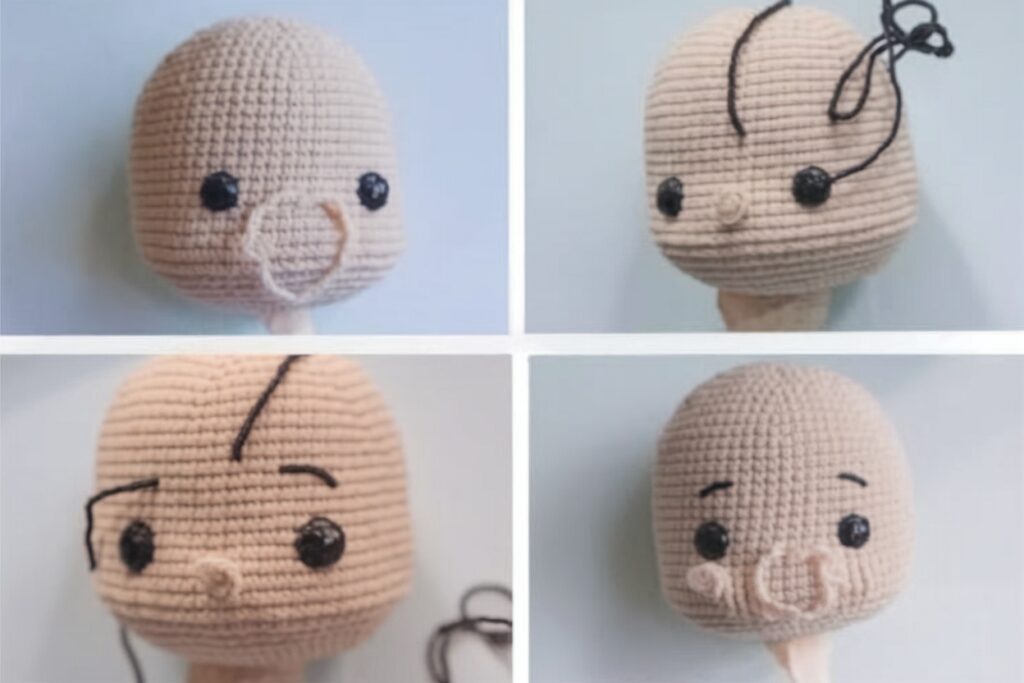
Adding Expressive Facial Details
The facial details will bring your doll to life with personality and charm:
- Eyes: Using white embroidery thread, create small circles around the safety eyes to form the whites of the eyes
- Eyebrows: With brown embroidery thread, add delicate curved lines above the eyes for eyebrows
- Eyelashes: Using the same brown thread, add small straight stitches extending from the outer corners of each eye
- Nose: With skin-colored thread, embroider a small triangle or “V” shape in the middle area between the eyes
Your adorable doll head is now complete and ready to be attached to the body later in the project!
Creating Hair for Girl in Yellow Dress
Hair Instructions (Using Brown Yarn)
One of the most charming features of this crochet doll is her gorgeous braided hairstyle! This section will guide you through creating the perfect middle-parted braids that frame her sweet face and add so much character to your finished doll.
Preparing the Hair Strands
Before you begin attaching hair to your doll, you’ll need to prepare the yarn:
- Cut Your Hair Pieces: Using brown yarn, cut 40 individual strands, each measuring 50cm (about 20 inches) in length
- Organize Your Strands: Group your yarn pieces together and keep them organized to prevent tangling during the attachment process
- Select Your Tools: Have a yarn needle ready for securing the strands to the head
💡 Pro Tip: For a more natural look, consider using slightly different shades of brown, or mix in a few strands of a complementary color like auburn or blonde for dimension!
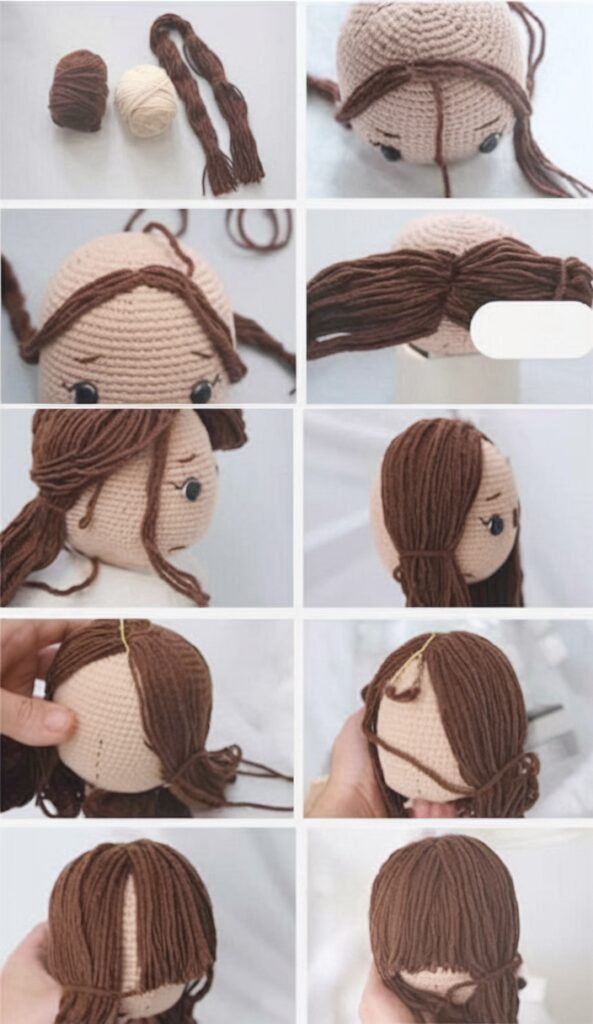
Attaching the Hair to the Doll’s Head
Follow these steps to create the perfect middle-parted hairstyle with braids:
- Find the Top Center: Locate the middle of Round 7 on top of the doll’s head – this will be your starting point for the hair
- Create the Part: Divide the head into left and right sections, planning where the middle part will run from front to back
- Begin Attachment: Starting at the top center, fold each strand in half to create a loop
- Secure Each Strand: Insert your crochet hook through a stitch on the head, pull the folded loop through, then pull the loose ends through this loop and tighten (this creates a secure knot)
- Follow the Pattern: Continue attaching hair strands along the part line, working outward to cover both sides of the head
- Lower Hair Placement: Ensure the ends of the hair strands reach approximately 4 rows below the eyes in the front for the perfect face-framing effect
Creating the Braided Style
Now comes the fun part – styling your doll’s beautiful braids:
- Divide the Hair: Separate the attached hair into three main sections: left side, right side, and back
- Side Braids: For each side (left and right):
- Divide the hair into three equal portions
- Create a traditional braid by crossing the outer strands over the middle strand alternately
- Secure the end of each braid with a small piece of matching yarn or thread
- Back Hair: Arrange the hair at the back neatly, either:
- Leave flowing straight down for a classic look, or
- Create a center braid for a more intricate style
Finishing Touches
To complete your doll’s perfect hairstyle:
- Trim Ends: Carefully trim any uneven ends to create a polished look
- Style as Desired: Gently arrange the braids to frame the doll’s face attractively
- Optional Embellishments: Consider adding tiny bows or ribbons to the ends of the braids for extra charm
Your doll now has a beautiful, customizable hairstyle that enhances her adorable appearance and makes her truly unique!
Creating Hands of The Girl in Yellow Dress
Hand Instructions Using Skin-Colored Yarn
Create two identical hands using skin-colored yarn:
- Starting the Hand:
- Round 1: 6 sc in magic ring
- Round 2: Increase in each stitch (12 stitches total)
- Rounds 3-5: 12 sc in each round (maintain 12 stitches)
- Forming the Thumb:
- Round 6: 2 sc, 4 dc in one stitch, 9 sc (15 stitches)
- Round 7: 2 sc, 4 dc in one stitch, 9 sc (12 stitches)
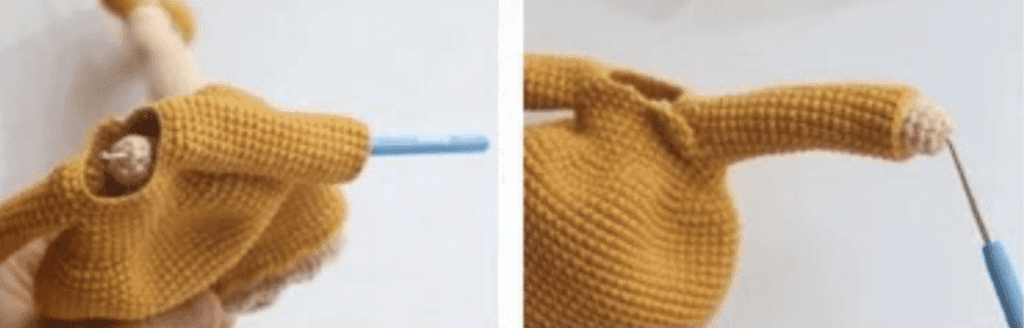
- Creating the Arm:
- Round 8: (1 sc, 1 dec) repeated 4 times (8 stitches)
- Rounds 9-27: 8 sc in each round to form a long arm (19 rounds total)
Creating the Legs for The Girl in Yellow Dress
Legs Using Turmeric and White Yarns
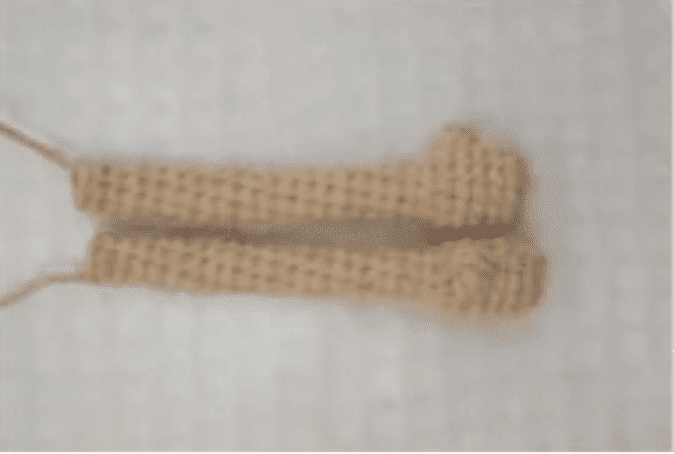
Start with turmeric (yellow) yarn:
- Chain 4, begin crocheting from the second-to-last stitch
- Rnd 1: 2 sc, 3 sc in one stitch, 2 sc, 3 sc in one stitch (10)
- Rnd 2: 2 sc, 3 inc, 2 sc, 3 inc (16)
- Rnd 3: 3 sc, (1 inc, 1 sc) x 2, 1 inc, 3 sc, (1 inc, 1 sc) x 2, 1 inc (22)
- Rnd 4: 4 sc, (1 inc, 1 sc) x 2, 1 inc, 6 sc, (1 inc, 1 sc) x 2, 1 inc, 2 sc (28)
- Rnd 5: 11 sc, 1 inc, 4 sc, 1 inc, 11 sc (30)
- Rnd 6: In back loops only (BLO), 30 sc
- Insert cardboard into the foot bottom for stability
- Rnd 7-8: 30 sc
- Rnd 9: 7 sc, (1 dec, 1 sc) x 6, 5 sc (30)
- Rnd 10: 7 sc, (1 dec, 1 sc) x 4, 5 sc (20)
- Rnd 11: (2 sc, 1 dec) x 5 (15)
- Rnd 12-17: 15 sc
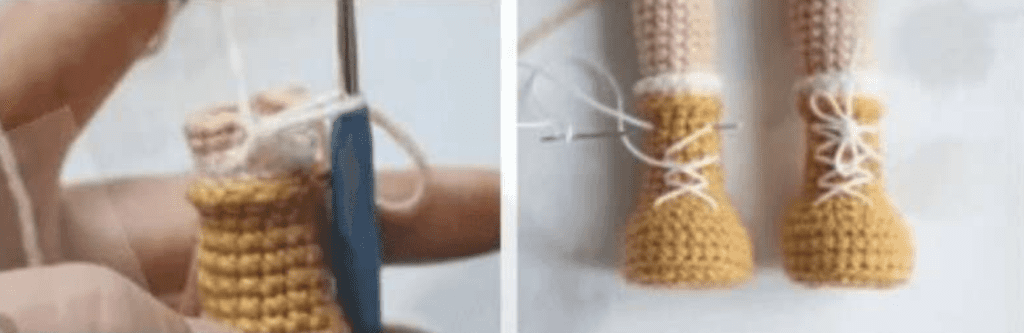
Switch to white yarn for shoe detail:
- Rnd 18: In back loops only (BLO), 15 sc (15)
- Rnd 19: 1 inc, 14 sc (16)
Change to skin color for leg:
- Rnd 20: In back loops only (BLO), 16 sc (16)
- Rnd 21: 16 sc
- Rnd 22-23: 16 sc (16)
- Rnd 24: 1 sc, 1 inc, 14 sc (17)
- Rnd 25-28: 17 sc
- Rnd 29: 15 sc, 1 dec (16)
- Rnd 30: (1 sc, 1 dec) x 2, 3 sc, 3 inc, 4 sc (17)
- Rnd 31: 17 sc
- Rnd 32: 2 sc, 1 inc, 14 sc (18)
- Rnd 33-34: 18 sc
- Rnd 35: 3 sc, 1 inc, 14 sc (19)
- Rnd 36-37: 19 sc
- Rnd 38: 4 sc, 1 inc, 14 sc (20)
- Rnd 39-44: 20 sc (20)
For first leg: Cut yarn and fasten off. For second leg: Keep yarn attached for connecting to body.
Stuff both legs firmly, then:
- Using turmeric yarn, work in front loops of Rnd 18: 15 sc
- Using white yarn, work in front loops of Rnd 20: 16 sc
- Add white embroidery thread for shoelaces detail
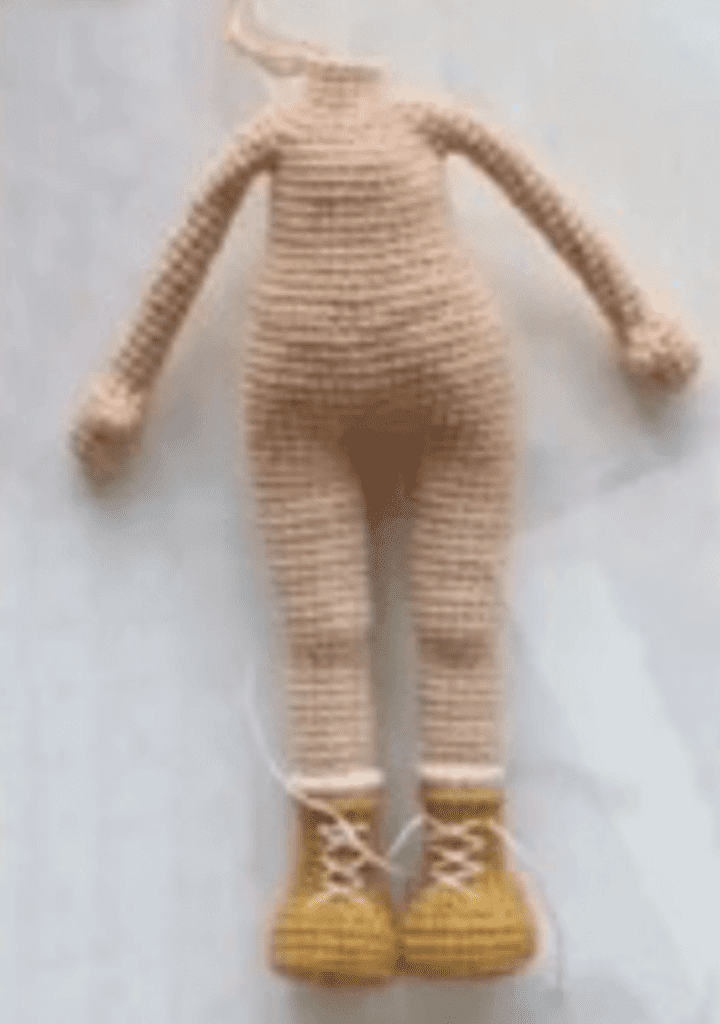
Connecting The Girl in Yellow Dress and Creating the Body
- Chain 2 to connect both legs, then continue with the body:
- Rnd 1: 20 sc, 2 inc, 20 sc, 2 inc (48)
- Rnd 2-11: 48 sc for 10 rounds
- Rnd 12: (6 sc, 1 dec) x 6 (42)
- Rnd 13-14: 42 sc for 2 rounds
- Rnd 15: (5 sc, 1 dec) x 6 (36)
- Rnd 16-21: 36 sc for 6 rounds
Attaching arms to body:
- Rnd 22: 8 sc, 1 sc (joining body and hand), 16 sc, 1 sc (joining body and hand), 10 sc (36)
- Rnd 23: 8 sc, 7 sc (remaining hand), 16 sc, 7 sc (remaining hand), 10 sc (48)
Shaping the neck:
- Rnd 24: (6 sc, 1 dec) x 6 (42)
- Rnd 25: (5 sc, 1 dec) x 6 (36)
- Rnd 26: (4 sc, 1 dec) x 6 (30)
- Rnd 27: (3 sc, 1 dec) x 6 (24)
- Rnd 28: (2 sc, 1 dec) x 6 (18)
- Rnd 29-31: 18 sc for 3 rounds
Fill the body with stuffing, fasten off, and leave a long tail for attaching the head later.
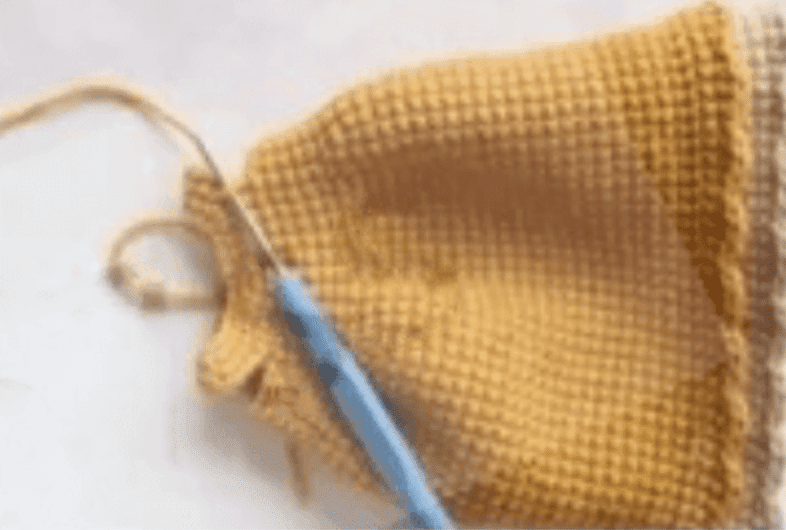
Creating the Girl’s Yellow Dress
Dress Instructions Using Turmeric (Yellow) Yarn
- Chain 31, begin from the second-to-last stitch
- Rnd 1: (4 sc, 1 inc) x 6 (36)
- Rnd 2: (8 sc, 1 inc) x 4 (40)
- Rnd 3: 6 sc, 7 ch, 8 sp, 12 sc, 7 ch, 8 sp, 6 sc (38) – forms armholes
- Rnd 4-8: 38 sc for 5 rounds
- Rnd 9: (1 sc, 1 inc) x 19 (57) – begins skirt flare
- Rnd 10: (2 sc, 1 inc) x 19 (76) – completes flared skirt
- Rnd 11-31: 76 sc for 21 rounds – forms the skirt length
- Rnd 32: Front loops only (FLO), 76 sc
- Rnd 33-34: 76 sc for 2 rounds
- Rnd 35: [1 ss, 1 hdc, 1 dc, 1 hdc, 1 ss] repeat pattern around – creates decorative edge
Decorative bottom trim with light brown yarn:
- On Rnd 31, work in back loops only (BLO), 76 sc
- Rnd 2-5: 76 sc for 4 rounds
- Rnd 6: [1 ss, 1 hdc, 1 dc, 1 hdc, 1 ss] repeat pattern around – creates decorative brown border

Adding Sleeves to the Dress
Sleeve Instructions (Make 2) Using Turmeric (Yellow) Yarn
- Attach turmeric yarn to armhole opening on dress
- Rnd 1-21: 16 sc in each round for 21 rounds
- Finish with slip stitch and weave in end to conceal
Final Assembly:
- Dress the doll by carefully slipping the yellow dress over the body
- Position the dress properly, making sure sleeves align with arms
- Once dressed, attach the head to the body by sewing with the long yarn tail left from the neck
- Ensure head is centered and securely attached
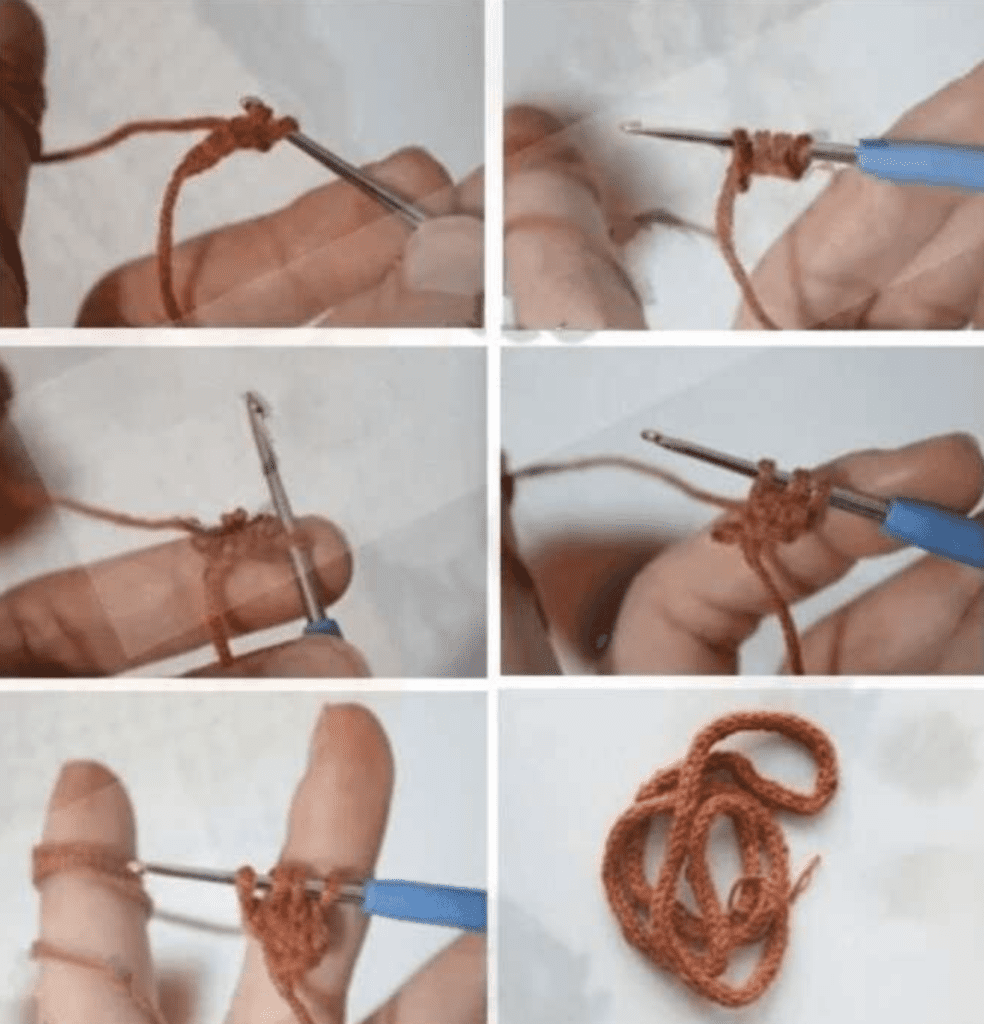
Creating the Cozy Orange Scarf Using Orange Yarn
- Chain 4 to begin
- Row 1: Turn work, 3 sc, chain 1
- Continue repeating this pattern (turn, 3 sc, chain 1) for each row
- Keep working rows until your scarf reaches approximately 75cm (29.5 inches) in length
- Fasten off and weave in ends
Wrap the finished scarf gently around the doll’s neck for a perfect winter accessory that complements her orange hat!
Creating the Adorable Orange Hat
- Rnd 1: Work 12 double crochet (dc) in magic ring
- Rnd 2: (2 dc in one stitch) x 12 (24)
- Rnd 3: (1 dc, 2 dc in one stitch) x 12 (36)
- Rnd 4: (2 dc, 2 dc in one stitch) x 12 (48)
- Rnd 5: 48 dc
- Rnd 6: (3 dc, 2 dc in one stitch) x 12 (60)
- Rnd 7-16: 60 dc for 10 rounds to create hat height
- Finish with slip stitch and weave in end to conceal

Final Touch:
Create a fluffy pompom using orange yarn and attach securely to the top of the hat for an extra cute finishing touch!
