

Table of Contents
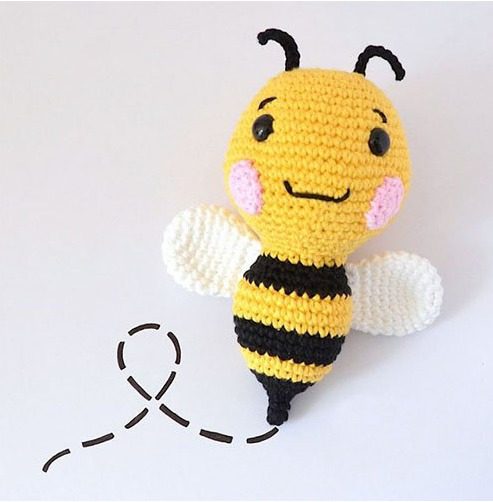
Looking for a sweet and simple crochet project that’s perfect for beginners? This bee amigurumi pattern Bee Amigurumi creates an adorable stuffed insect with classic black and yellow stripes, delicate wings, and charming facial features. Ideal for novice crocheters wanting to practice basic techniques, this detailed guide walks you through creating a huggable bee friend that’s sure to delight crafters of all ages.
Essential Materials for Your Bee Amigurumi
Before beginning this buzz-worthy project, gather these supplies:
- Yarn:
- Red Heart Scrubby Smoothie (Lace 4) or similar weight yarn in:
- Black
- Yellow
- White
- Pink
- Red Heart Scrubby Smoothie (Lace 4) or similar weight yarn in:
- Hook: 3.5 mm crochet hook
- Notions:
- 10mm black safety eyes
- Polyester fiberfill stuffing
- Yarn needle
- Scissors
- Stitch markers
Bee Amigurumi Crochet Terminology Used
- mr: Magic ring – starting ring that can be tightened
- ch: Chain stitch
- sl st: Slip stitch
- sc: Single crochet
- dc: Double crochet
- dec: Decrease – two single crochet stitches worked together
- inc: Increase – two single crochet stitches in the same stitch
- F/O: Fasten off
- … repeat **: Repeat the pattern between asterisks the number of times indicated
Step-by-Step Bee Amigurumi Pattern Instructions
Creating the Head (Yellow Yarn)
Round 1: 8 sc in a magic ring (8) Round 2: inc around (16) Round 3: 1 sc, inc, repeat around (24) Round 4: 2 sc, inc, repeat around (32) Round 5: 3 sc, inc, repeat around (40) Rounds 6-7: sc even (40) Round 8: 4 sc, inc, repeat around (48) Rounds 9-11: sc even (48) Round 12: 5 sc, inc, repeat around (56) Rounds 13-15: sc even (56)
At this point, insert safety eyes between rounds 10 and 11, approximately 9 stitches apart.
Round 16: 5 sc, dec, repeat around (48) Round 17: 4 sc, dec, repeat around (40) Round 18: sc even (40) – begin stuffing the head Round 19: 3 sc, dec, repeat around (32) Round 20: 2 sc, dec, repeat around (24) Round 21: 1 sc, dec, repeat around (16)
Fasten off and close the hole. Complete stuffing the head firmly.
Using black yarn, embroider the mouth and eyebrows to give your bee character.
Forming the Cheeks (Pink Yarn – Make 2)
Round 1: 6 sc in a magic ring (6) Round 2: inc around (12)
Fasten off, leaving a long tail of yarn for sewing the cheeks onto the head.
Creating the Antennas (Black Yarn – Make 2)
Chain 10, slip stitch in the 2nd chain from the hook, then 8 slip stitches (9)
Fasten off, leaving a long tail of yarn for sewing the antennas to the top of the head, between rounds 2 and 3.
Bee Amigurumi Crafting the Body (Black and Yellow Yarn)
Round 1: Using black yarn, 4 sc in magic ring (4) Round 2: 1 sc, 1 inc, repeat twice (6) Round 3: sc even (6) Round 4: 2 sc, 1 inc, repeat twice (8) Round 5: 1 sc, 1 inc, repeat around (12) Round 6: 1 sc, 1 inc, repeat twice (18) Round 7: sc even (18) Round 8: Switch to yellow yarn, 2 sc, 1 inc, repeat around (24) Round 9: sc even (24) Round 10: Switch to black yarn, 3 sc, 1 inc, repeat around (30) Rounds 11-12: sc even (30) Round 13: Switch to yellow yarn, sc even (30) Rounds 14-15: sc even (30) – begin stuffing the body Round 16: Switch to black yarn, 3 sc, 1 dec, repeat around (24) Round 17: sc even (24) Round 18: 1 sc, 1 dec, repeat around (16) Round 19: Switch to yellow yarn, sc even (16)
Fasten off, leaving a long tail of yarn to attach the body to the head. Complete stuffing the body firmly.
Bee Amigurumi Making the Wings (White Yarn – Make 2)
Round 1: 6 sc in a magic ring (6) Round 2: inc around (12) Round 3: 1 sc, inc, repeat around (18) Rounds 4-6: sc even (18) Round 7: 7 sc, dec, repeat twice (16) Round 8: 6 sc, dec, repeat twice (14) Round 9: 5 sc, dec, repeat twice (12) Round 10: Flatten the wing and crochet through both layers, 6 sc (6)
Fasten off, leaving a long tail of yarn to sew the wing to the side of the body (between rounds 13 and 18).
Bee Amigurumi Final Assembly Instructions
- Attach the Cheeks:
- Position the pink cheeks on either side of the face below the eyes
- Sew securely in place
- Attach the Antennas:
- Sew the antennas to the top of the head
- Position them between rounds 2 and 3, spaced evenly apart
- Curve them slightly for a natural appearance
- Join Head and Body:
- Position the head on top of the body
- Sew securely around the neck opening
- Ensure the face is properly aligned with the front of the body
- Attach the Wings:
- Position the wings on either side of the body between rounds 13 and 18
- Sew securely in place
- Angle them slightly upward for a flying appearance
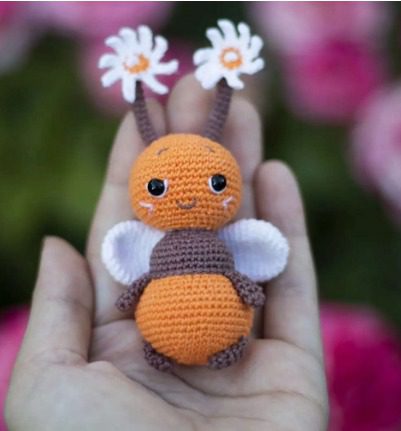
Customization Ideas for Your Bee Amigurumi
- Size Variations: Use different weight yarns and hook sizes to create larger or smaller bees
- Color Options: Create bumblebees with darker yellow or honey bees with golden yellow
- Accessories: Add a tiny flower or honey pot accessory
- Expressions: Vary the embroidery to create different facial expressions
- Wing Alternatives: Try iridescent fabric or felt for the wings for a different texture
- Stinger: Add a small black stinger at the back for more detail
Display and Gift Ideas
- Create a bee family with different sizes
- Pair with crocheted flowers for a spring-themed display
- Attach to a keychain or backpack as a cute accessory
- Make as party favors for a garden or nature-themed celebration
- Create a mobile for a nursery with multiple bees and clouds
Check this out :Crocheting an Adorable Flower Gal Amigurumi Doll
Care Instructions for Your Crocheted Bee
- Spot clean with mild soap and water as needed
- Air dry thoroughly away from direct heat
- Gently reshape if flattened during storage
- Store in a clean, dry place
- If using as a child’s toy, periodically check security of all attached parts
This adorable bee amigurumi combines simple crochet techniques with playful color changes to create a delightful finished project. The striped body and delicate wings capture the essence of a friendly bee, while the expressive face gives it personality. Whether made as a gift or a decoration for your own space, this buzzing friend brings a touch of spring year-round.
Happy crocheting!
