

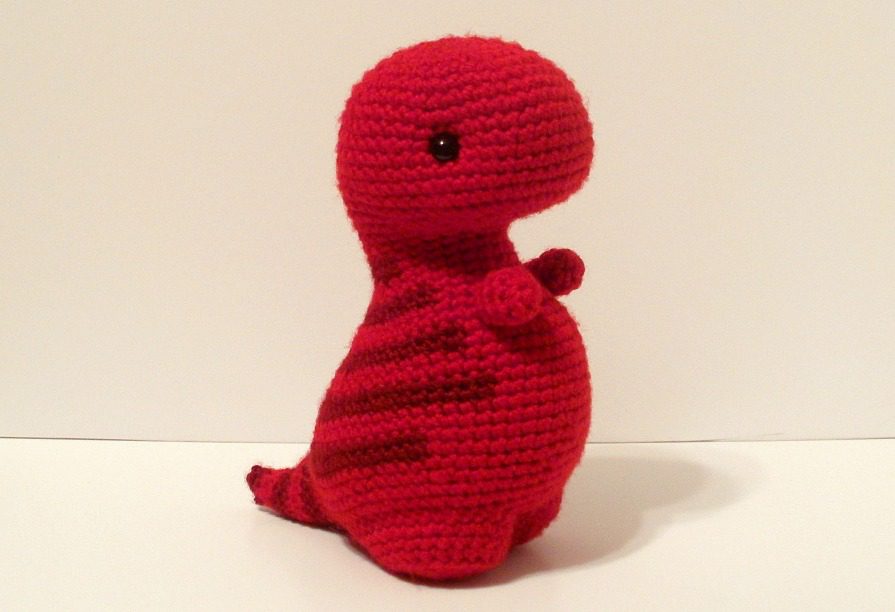
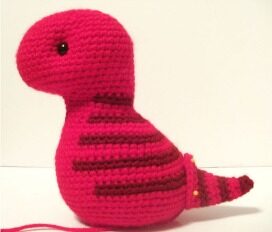
- Featured Craft: Meet our darling red dinosaur plushie—the perfect cuddly companion for all ages!
- Crafting Passion: Dive into a world of crochet and amigurumi; find tutorials, tips, and inspiration to create your own lovable characters.
- Home Decor: Discover how to incorporate these cute creations into your living space for a cozy and whimsical touch.
- Community Love: Join a passionate community of crafters sharing their unique designs and techniques.
Supplies
Worsted Weight Yarn (~260′ of color A, ~50′ of color B)
10mm Safety Eyes (2)
Stuffing
Crochet Hook (size F)
Stitch Marker (a paperclip works well)
Large Sewing Needle
Stitch Glossary
SC= Single Crochet
INC 2 = 2 SC in same Stitch
SS = Slip Stitch
DCR = Decrease
Scissors
Pins
Changing Colors
You’ll need to change colors for this pattern, but no worries if you don’t know how to do that yet. It’s
actually quite simple!
To switch colors, stop midway through your last stitch of the current color – when you have two loops
on the hook. Instead of a drawing up a loop of the current color, draw up a loop of the new color. Then
continue crocheting with the new color. See? Nothing to it!
Since the color changes in the tail take place at the beginning of each row, you can leave the previouscolor attached when you change colors. When the time comes to change back, just pick the color up
again. For the last color change, trim the previous color and tie off the end, then complete the final two
rows.
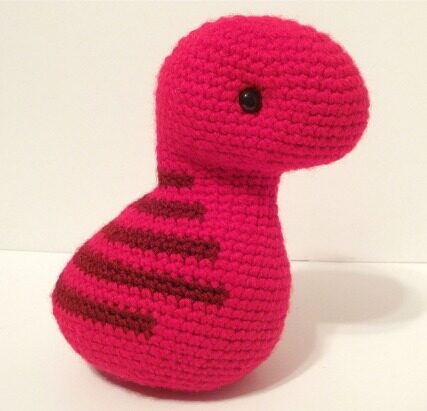
body
Use Yarn Color A
Row 1: 8 SC in Magic Ring (8 stitches)
Row 2: INC 2 x 8 (16 stitches)
Row 3: SC, INC 2 x 8 (24 stitches)
Row 4: 2 SC, INC 2 x 8 (32 stitches)
Row 5: 32 SC (32 stitches)
Row 6: 3 SC, INC 2 x 8 (40 stitches)
Row 7: 40 SC (40 stitches)
Row 8: 4 SC, INC 2 x 8 (48 stitches)
Row 9-15: 48 SC (7 rows of 48 stitches)
Row 16: 16 SC, DCR x 8, 16 SC (40 stitches)
Row 17: 12 SC, DCR x 8, 12 SC (32 stitches)
Row 18: 8 SC, DCR x 8, 8 SC (24 stitches)
Row 19: 18 SC – Change to Color B, 6 SC (24 stitches)
Row 20: 6 SC – Change to Color A, 12 SC – Change to
Color B, 6 SC (24 stitches)
Row 21: 6 SC – Change to Color A, 18 SC (24 stitches)
Row 22: 24 SC (24 stitches)
Take a break from all that crocheting and stuff the head.
Now it’s time for the eyes! It’s important to do it now,
before you crochet the rest of the body.
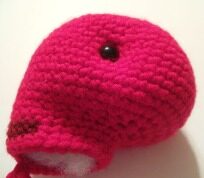
Eyes
Count down 10 rows from the top of the head, then place a pin between rows 10 and 11, in the center
of the head. Count over 12 stitches on either side of the center pin and mark each spot. This is where
the eyes wil go.
Using the large sewing needle and 2′ of yarn A, sew back and forth between the marked stitches. Pulleach stitch tight to shape the head. After 2 passes, tie off the yarn and thread the excess through the
head. Place the eyes and, with the convex side facing the the back of the eye, push the washer on.
You should hear it snap into place. Now back to crocheting!
Row 23: SC, INC 2 x 3, 13 SC – Change to Color B, 4 SC, INC 2 (28 stitches)
Row 24: SC, INC 2 x 4, 2 SC – Change to Color A, 12 SC – Change to Color B, 6 SC (32 stitches)
Row 25: 14 SC – Change to Color A, 18 SC (32 stitches)
Row 26: SC, INC 2 x 4, 8 SC, SC, INC 2 x 4, 8 SC (40 stitches)
Row 27: 34 SC – Change to Color B, 6 SC (40 stitches)
Row 28: 20 SC – Change to Color A, 14 SC – Change to Color B, 6 SC (40 stitches)
Row 29: 4 SC, SC, INC 2 x 4, 8 SC – Change to Color A, 4 SC, SC, INC 2 x 4, 8 SC (48 stitches)
Row 30: 48 SC (48 stitches)
Row 31: 42 SC – Change to Color B, 6 SC (48 stitches)
Row 32: 2 SC, SC, INC 2 x 8, 8 SC – Change to Color A, 16 SC – Change to Color B, 6 SC (56 stitches)Row 33: 34 SC – Change to Color A, 22 SC (56 stitches)
Row 34: 56 SC (56 stitches)
Row 35: 54 SC- Change to Color B, 2 SC (56 stitches)
Row 36: 6 SC, SC, INC 2 x 8, 8 SC – Change to Color A, 24 SC – Change to Color B, 2 SC (64 stitches)Row 37: 38 SC – Change to Color A, 26 SC (64 stitches)
Row 38: 64 SC (64 stitches)
Row 39: 6 SC, DCR x 8 (56 stitches)
Row 40-41: 56 SC (2 rows of 56 stitches)
Row 42: 5 SC, DCR x 8 (48 stitches)
Row43: 48 SC (48 stitches)
Row 44: 4 SC, DCR x 8 (40 stitches)
Row 45: 3 SC, DCR x 8 (32 stitches)
Row 46: 2 SC, DCR x 8 (24 stitches)
Finish stuffing the t-rex.
Row 47: SC, DCR x 8 (16 stitches)
Row 48: DCR x 8 (8 stitches)
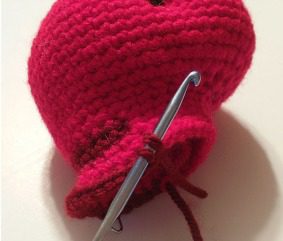
Slip Stitch and finish off, leaving a tail
Sew the body closed.
Arm
Use Yarn Color A
Row 1: 8 SC in Magic Ring (8 stitches)
Row 2: 8 SC (8 stitches)
Row 3: 2 SC, DCR x 2
Row 4: 6 SC (6 stitches)
(6 stitches)
Slip Stitch and finish off, leaving a tail
Make 2
Leg
Use Yarn Color A
Row 1: 8 SC in Magic Ring (8 stitches)
Row 2: INC 2 x 8 (16 stitches)
Row 3: SC, INC 2 x 8 (24 stitches)
Row 4: 24 SC in back loops of previous row (24 stitches)
Row 5: 24 SC (24 stitches)
Row 6: 2 SC, INC 2 x 8 (32 stitches)
Slip Stitch and finish off, leaving a tail
Make 2
Tail
Use Yarn Color B
Row 1: 4 SC in Magic Ring (4 stitches)
Row 2: SC, INC 2 x 2 (6 stitches)
- Change to Color A – Row 3: 6 SC (6 stitches)
Row 4: SC, INC 2 x 3 (9 stitches)
Change to Color B – Row 5: 9 SC (9 stitches)
Row 6: 3 SC, INC 2 x 3, 3 SC (12 stitches)
Change to Color A – Row 7: 12 SC
Row 8: 4 SC, INC 2 x 4, 4 SC (16 stitches) - Change to Color B – Row 9-10: 16 SC (2 rows of 16 stitches)
Change to Color A – Row 11: 6 SC, INC 2 x 4, 6 SC (20 stitches)
Row 12: 8 SC, INC 2 x 4, 8 SC (24 stitches)
Slip Stitch and finish off, leaving a tail
©2013 Kelsey Liggett. For personal use only.
Assembly
You’re almost there! Take the tail and pin it in place. The top should line up with the bottom of the 2ndto last stripe. Once you’re happy with the placement, take the tail of yarn you left earlier and the largesewing needle and sew the tail to the body. Stuff the tail when you’re about 3/4 of the way around.
Time for the legs. Count out 8 rows from the final row and mark it with a pin on each side. Pin the leg
in place, lining up the outer side with the 8th row you just marked and the inner side with the center.
The leg should be about midway between the front of the body and the tail.
You’re nearly finished! Stuff the arms – they only need a small amount – then mark out their placementon the body. I typically place them between the 2nd and 3rd stripes, a stitch or two over from where
the stripes end. Take the tail you left and the large sewing needle and sew the arms in place.
Congratulations!
You’ve made your
very own t-rex!
