

Table of Contents
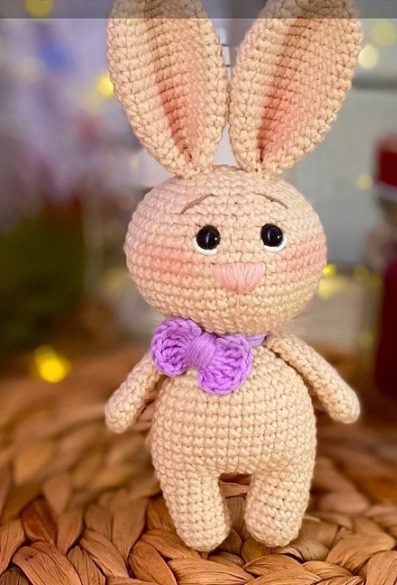
Amigurumi bunnies are among the most beloved crochet projects, combining simplicity with undeniable charm. With their round faces, long ears, and sweet expressions, these crocheted companions make perfect gifts for children and adults alike. This comprehensive guide will walk you through creating your own adorable amigurumi bunny with a stylish bow tie, just like the one featured in the image.
Amigurumi Bunny Materials You’ll Need
- Amigurumi Bunny Yarn:
- Main color (beige): Gazzal Baby Cotton beige #3424 or similar cotton yarn
- Bow tie color (purple/violet): YarnArt Ideal violet #245 or similar
- Nose color (pink): Alize Bella pink #613 or similar
- Optional for white bunny: Alize Cotton Gold Tweed white #55
- Optional for bow tie variation: YarnArt Jeans raspberry #59
- Amigurumi Bunny Tools:
- 2mm crochet hook
- 6mm safety eyes
- Polyester fiberfill stuffing
- Scissors
- Pins and needles for assembly
- Stitch marker (optional)
Amigurumi Bunny Abbreviations
- MR – Magic Ring (Amigurumi ring)
- CH – Chain stitch
- SC – Single crochet (US) / Double crochet (UK)
- INC – Increase (2 SC in same stitch)
- DEC – Decrease
- SL ST – Slip stitch
- BLO – Back loop only
- (…)×n – Repeat instructions in parentheses n times
Amigurumi Bunny Detailed Pattern Instructions
Amigurumi Bunny Arms (Make 2)
- 5 SC in magic ring
- INC in each stitch around (10 stitches)
- SC in each stitch for 9 rounds (10 stitches)
- (3 SC, DEC)×2 (8 stitches)
- Fold the arm in half and join with 3 SC through both layers
- Cut yarn and pull through the last loop
- Hide the yarn tail inside the piece using a needle
Amigurumi Bunny Bunny Ears (Make 2)
- 6 SC in magic ring
- INC in each stitch around (12 stitches)
- (1 SC, INC)×6 (18 stitches)
- (2 SC, INC)×6 (24 stitches)
- SC in each stitch for 10 rounds (24 stitches)
- (10 SC, DEC)×2 (22 stitches)
- (9 SC, DEC)×2 (20 stitches)
- (8 SC, DEC)×2 (18 stitches)
- (7 SC, DEC)×2 (16 stitches)
- (6 SC, DEC)×2 (14 stitches)
- Cut yarn, leaving a long tail for sewing
- Fold the ear in half at the bottom and sew together with a needle
- Use the remaining yarn to attach the ear to the head
Amigurumi Bunny Bear/Alternative Ears (Make 2)
- 6 SC in magic ring
- INC in each stitch around (12 stitches)
- SC in each stitch (12 stitches)
- (4 SC, DEC)×2 (10 stitches)
- Cut yarn, leaving a long tail for sewing to the head
Amigurumi Bunny Muzzle/Snout
- 6 SC in magic ring
- INC in each stitch around (12 stitches)
- (1 SC, INC)×6 (18 stitches)
- Complete 1 slip stitch and cut yarn, leaving a long tail for sewing
- Embroider a triangular nose and a small strip below it
Legs (Make 2)
- 6 SC in magic ring
- INC in each stitch around (12 stitches)
- SC in each stitch for 6 rounds (12 stitches)
- Complete 1 slip stitch
- For the first leg, cut yarn. For the second leg, do not cut yarn as you’ll continue to work the body from this leg
Body
Start from the second leg:
- Chain 3
- (4 SC, INC)×6 (36 stitches)
- SC in each stitch for 10 rounds (36 stitches)
- In the middle of the 5th round, work 5 slip stitches to create a small tail
- (4 SC, DEC)×6 (30 stitches)
- (3 SC, DEC)×6 (24 stitches)
- Stuff the body firmly
- (2 SC, DEC)×6 (18 stitches)
- SC around, attaching the arms at the sides (18 stitches)
- (1 SC, DEC)×6 (12 stitches)
- Stuff the upper part of the body firmly
- Do not cut yarn, continue to work the head
Head (Continuing from body)
- (1 SC, INC)×6 (18 stitches)
- (2 SC, INC)×6 (24 stitches)
- (3 SC, INC)×6 (30 stitches)
- (4 SC, INC)×6 (36 stitches)
- (5 SC, INC)×6 (42 stitches)
- (6 SC, INC)×6 (48 stitches)
- (7 SC, INC)×6 (54 stitches)
- SC in each stitch for 7 rounds (54 stitches)
- Attach safety eyes between rounds 29 and 30, approximately 5 stitches apart
- (7 SC, DEC)×6 (48 stitches)
- (6 SC, DEC)×6 (42 stitches)
- Stuff the head firmly
- (5 SC, DEC)×6 (36 stitches)
- (4 SC, DEC)×6 (30 stitches)
- (3 SC, DEC)×6 (24 stitches)
- (2 SC, DEC)×6 (18 stitches)
- (1 SC, DEC)×6 (12 stitches)
- DEC around (6 stitches)
- Close the opening using a yarn needle
Bow Tie
- In a magic ring, work: (3 CH, 6 DC with 2 yarn overs, 3 CH, SL ST)×2, then 1 CH
- Cut a long piece of yarn and wrap it around the center of the bow tie several times
- Then wrap the yarn around the bunny’s neck a couple of times
- Secure the ends and hide them inside the toy
Assembly Instructions
- Attach the muzzle to the head (if making a bear) or embroider a nose (if making a bunny)
- Secure with pins before sewing
- Embroider the nose, eye whites, and eyebrows as needed
- Attach the ears, securing with pins before sewing
- If desired, add blush to the cheeks using dry pastels or fabric-safe makeup
Customization Options
You can easily customize your amigurumi bunny:
- Color Variations:
- Create a white bunny using Alize Cotton Gold Tweed white #55
- Make a bear using YarnArt Jeans beige #48 for the body, blue #76 for the bow tie, and brown #70 for the nose
- Experiment with different colored bow ties to match seasons or occasions
- Size Adjustments:
- Use thicker yarn and a larger hook for a bigger bunny
- Use thinner yarn and a smaller hook for a tiny version
- Expression Changes:
- Vary the placement of eyes for different expressions
- Embroider different mouth shapes for happy, sleepy, or surprised looks
Finishing Touches
Give your bunny character with these final details:
- Add blush to the cheeks using dry pastels for a sweet expression
- Ensure all stuffing is evenly distributed, especially in the head and limbs
- Gently shape the ears into a natural position
Check this out :Colorful Amigurumi Character Collection
Conclusion
Your adorable amigurumi bunny with bow tie is now complete! This charming handmade creation makes a perfect gift for children, a sweet decorative item for your home, or a wonderful addition to your amigurumi collection. The simple yet expressive design of this bunny has timeless appeal that brings joy to crafters and recipients alike.
Remember that each handmade amigurumi has its own unique character – embrace any little imperfections as they add to the charm of your creation. Happy crocheting!
