

Table of Contents
Amigurumi, the Japanese art of crocheting small stuffed toys, has captured the hearts of crafters worldwide. These charming creations combine creativity with crochet techniques to produce delightful characters that bring joy to creators and recipients alike. This comprehensive guide explores the world of character-based amigurumi dolls, perfect for beginners and experienced crocheters seeking inspiration for their next project.
What Makes Character Amigurumi Special
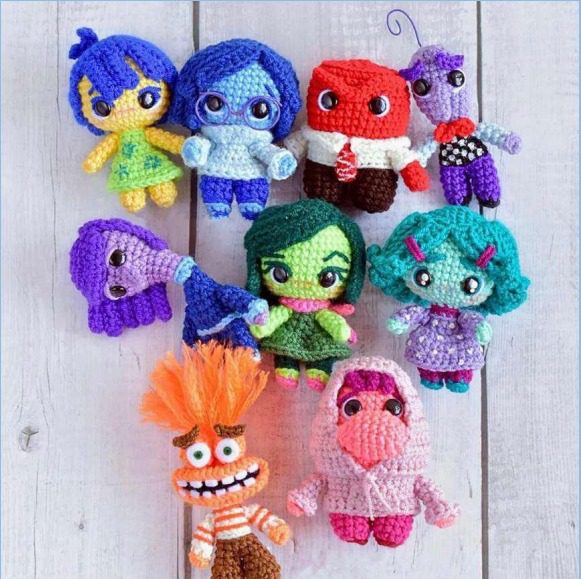
Character amigurumi dolls stand out in the crochet world for their personality and charm. Unlike traditional stuffed animals, these miniature figures often feature distinctive characteristics such as vibrant hair colors, expressive faces, and themed outfits that give each creation a unique identity. The collection shown features characters with varied designs—from bright orange monster-like figures to sweet purple alien-inspired dolls—demonstrating the versatility of this craft form.
Essential Techniques for Creating Expressive Amigurumi
Creating personality-filled amigurumi requires mastering several key techniques:
Colorful Face Embroidery
The most important aspect of character amigurumi is the face. Notice how each doll in the collection has distinctive facial features that convey emotion and personality. Using simple embroidery stitches, you can create:
- Eyes with dimension and expression
- Smiles, frowns, or neutral expressions
- Blush marks for added cuteness
- Character-specific features like the orange creature’s toothy grin
Colorful Hair and Special Features
Hair dramatically transforms the appearance of amigurumi characters. The dolls in the collection showcase numerous options:
- Vibrant blue, purple, green, and teal yarn for fantasy-colored hair
- Various textures from smooth to fluffy
- Styled elements like ponytails, bobs, and flowing locks
- Special features like the purple character’s antennae
Colorful Color Combinations
Strategic color choices help define your character’s personality. The collection demonstrates how unexpected color pairings create visual interest:
- The contrast between blue hair and yellow faces
- Complementary color schemes like the purple and teal dolls
- Themed color patterns that tell a story about each character
Materials Needed for Colorful Amigurumi
To create your own character collection similar to these colorful creations, gather:
- Sport or fingering weight yarn in various colors (cotton yarn works especially well for defined stitches)
- Small crochet hooks (typically sizes 2.0mm to A)
- Safety eyes in various sizes and colors
- Embroidery thread for facial details
- Stuffing material
- Yarn needle for assembly
- Small scissors
- Stitch markers
Basic Pattern Structure for Colorful Characters
While each character has unique elements, most follow this general construction pattern:
- Head Base: Typically worked in a sphere shape using increases and decreases
- Body: Usually smaller than the head for cute proportions
- Limbs: Arms and legs worked separately and attached later
- Clothing Elements: Either crocheted directly onto the body or made separately
- Hair: Added using various techniques like yarn loops or separate crocheted pieces
- Facial Features: Applied using safety eyes and embroidery
- Accessories: Small crocheted items that enhance the character’s personality
Tips for Creating Cohesive Colorful Collections
The charm of the displayed collection comes from the characters’ individuality while maintaining a cohesive style. To achieve this balance:
- Use a consistent scale for all characters
- Maintain similar body proportions across the collection
- Vary colors and details while keeping the basic construction technique the same
- Create complementary but distinct personalities for each character
- Consider how characters will look displayed together
Personalizing Your Colorful Characters
What makes character amigurumi so appealing is the opportunity for personalization. Consider these creative approaches:
- Design characters based on favorite shows, games, or books
- Create fantasy creatures with unexpected color combinations
- Develop a signature style for your amigurumi by focusing on a particular feature
- Add tiny accessories that tell a story about each character
- Mix texture yarns for interesting visual and tactile elements
Colorful Display and Gifting Ideas
Once complete, character amigurumi collections like the one shown make wonderful:
- Shelf displays in children’s rooms
- Handmade gifts for collectors
- Photography subjects for craft portfolios
- Craft fair or online shop merchandise
- Custom gift sets with themed characters
Advanced Techniques for Character Development
For those looking to elevate their amigurumi characters beyond basics:
- Experiment with poseable wire armatures inside limbs
- Create removable clothing pieces
- Incorporate mixed media elements like fabric accessories
- Develop character families with matching features
- Design environments or props for storytelling
Basic Amigurumi Character Rounds
Colorful Head
- Round 1: 6 SC in magic ring
- Round 2: INC in each stitch around (12 stitches)
- Round 3: (SC, INC) repeat 6 times (18 stitches)
- Round 4: (2 SC, INC) repeat 6 times (24 stitches)
- Round 5: (3 SC, INC) repeat 6 times (30 stitches)
- Round 6: (4 SC, INC) repeat 6 times (36 stitches)
- Rounds 7-12: SC in each stitch around (36 stitches)
- Round 13: (4 SC, DEC) repeat 6 times (30 stitches)
- Round 14: (3 SC, DEC) repeat 6 times (24 stitches)
- Round 15: (2 SC, DEC) repeat 6 times (18 stitches)
- Insert safety eyes between rounds 8-9, approximately 6-8 stitches apart
- Begin stuffing the head firmly
- Round 16: (1 SC, DEC) repeat 6 times (12 stitches)
- Round 17: DEC repeat 6 times (6 stitches)
- Cut yarn, thread through remaining stitches, pull tight to close, and secure
Body
- Round 1: 6 SC in magic ring
- Round 2: INC in each stitch around (12 stitches)
- Round 3: (SC, INC) repeat 6 times (18 stitches)
- Round 4: (2 SC, INC) repeat 6 times (24 stitches)
- Rounds 5-9: SC in each stitch around (24 stitches)
- Round 10: (2 SC, DEC) repeat 6 times (18 stitches)
- Round 11: (1 SC, DEC) repeat 6 times (12 stitches)
- Stuff body firmly
- Round 12: DEC repeat 6 times (6 stitches)
- Cut yarn, thread through remaining stitches, pull tight to close, and secure
Arms (make 2)
- Round 1: 6 SC in magic ring
- Round 2: INC in each stitch around (12 stitches)
- Rounds 3-10: SC in each stitch around (12 stitches)
- For characters with mitten-like hands (like the blue character), continue with SC
- For characters with defined fingers, decrease in last round to 6 stitches
- Stuff lightly, especially at the top portion
- Cut yarn, thread through remaining stitches, pull tight to close, and secure
Legs (make 2)
- Round 1: 6 SC in magic ring
- Round 2: INC in each stitch around (12 stitches)
- Round 3: (SC, INC) repeat 6 times (18 stitches)
- Rounds 4-10: SC in each stitch around (18 stitches)
- Round 11: (1 SC, DEC) repeat 6 times (12 stitches)
- Stuff legs firmly
- Round 12: DEC repeat 6 times (6 stitches)
- Cut yarn, thread through remaining stitches, pull tight to close, and secure
Hair Cap Base (for dolls with full hair like blue and green characters)
- Round 1: 6 SC in magic ring
- Round 2: INC in each stitch around (12 stitches)
- Round 3: (SC, INC) repeat 6 times (18 stitches)
- Round 4: (2 SC, INC) repeat 6 times (24 stitches)
- Round 5: (3 SC, INC) repeat 6 times (30 stitches)
- Round 6: (4 SC, INC) repeat 6 times (36 stitches)
- Rounds 7-8: SC in each stitch around (36 stitches)
- Cut yarn and secure
Hair Strands (for attaching to hair cap)
- Cut yarn in desired color to approximately 8-10 inches long
- Fold strand in half
- Use crochet hook to pull folded end through stitch on hair cap
- Pull loose ends through the loop and tighten
- Repeat across entire hair cap, making hair denser where needed
- Trim to desired style after completing all strands
Special Features (Antennae for purple character)
- Chain 8
- Starting from second chain from hook, work 7 SC back
- Chain 1, turn
- 7 SC back to beginning
- Cut yarn and secure
- For the curled antenna, leave longer end and wrap around pencil before removing
- Attach to top of head
Assembly Instructions
- Sew head to body
- Attach arms at sides of body between rounds 5-6
- Attach legs at bottom of body
- Add hair cap and hair strands or special features
- Embroider facial details:
- For simple faces: straight stitch for mouth
- For expressive faces (like orange character): satin stitch for mouth
- Add French knots or straight stitches for eyebrows
- Use small pink stitches for blush marks
Clothing Elements Rounds
Basic Dress/Tunic (like green or purple characters)
- Join yarn at waist
- Round 1: SC in each stitch around body
- Round 2: (3 SC, INC) repeat around
- Rounds 3-6: SC in each stitch around
- Cut yarn and secure
Pants/Shorts
- Join yarn at leg opening
- Round 1: SC in each stitch around leg
- Round 2-4: SC in each stitch around
- Cut yarn and secure
- Repeat for second leg
Optional Accessories
Hair Bow (for teal character)
- Chain 8
- SC in second chain from hook and in each chain across (7 SC)
- Chain 1, turn
- 7 SC across
- Repeat rows 3-4 three more times
- Cut yarn, leaving long tail for attaching
- Pinch center of rectangle and wrap yarn around middle to create bow shape
- Sew onto character’s head
Scarf (for red character)
- Chain 25
- SC in second chain from hook and in each chain across
- Chain 1, turn
- SC across
- Repeat rows 3-4 once more
- Cut yarn, leaving long tail for attaching
- Wrap around character’s neck and sew in place
Remember that these character dolls can be customized with different colors, hairstyles, and accessories to create your own unique amigurumi collection. The basic structure remains the same, but the personality comes from the creative details you add to each one.
Preserving Your Amigurumi Collection
To keep your character collection looking its best:
- Store away from direct sunlight to prevent color fading
- Dust gently with a soft brush or compressed air
- Avoid excessive handling of delicate features
- Consider display cases for more elaborate collections
- Take photos to document your creative progress
Connecting with the Amigurumi Community
Character amigurumi creation has fostered a vibrant online community where crafters share:
- Pattern modifications and improvements
- Color combination ideas
- Solutions for technical challenges
- Inspiration for new character designs
- Celebration of completed projects
Check this out :Crochet an Adorable Plush Lion Amigurumi
Conclusion
Creating character-based amigurumi like the colorful collection shown combines technical crochet skills with artistic expression. These miniature personalities bring joy not only through their completed form but also through the meditative process of creating them stitch by stitch. Whether you’re making them as gifts, for personal enjoyment, or as part of a crafting business, character amigurumi offers endless possibilities for creative expression.
With some basic materials, patient practice, and imagination, you can develop your own distinctive amigurumi character collection that showcases your unique creative vision. The charm of these small, handcrafted dolls continues to captivate crafters worldwide, making amigurumi one of the most accessible and rewarding forms of fiber art.
