

Table of Contents
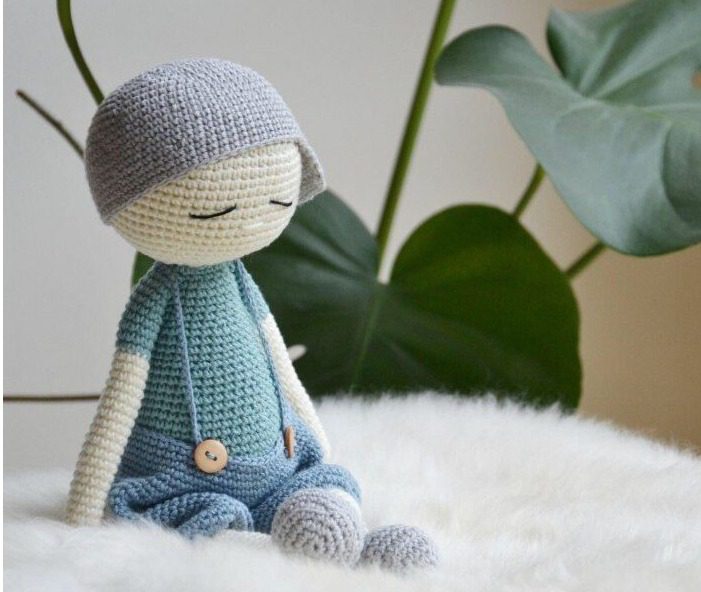
Create Girl Doll a stunning girl doll amigurumi with this detailed crochet pattern! Standing approximately 38 cm tall, this beautiful doll features an elegant double bun hairstyle, decorative headbands, and a lovely layered dress with shell stitch detailing. Perfect for intermediate crocheters, this pattern produces a charming, huggable doll that’s ideal for gifting, collecting, or inspiring creative play.
Materials Needed for Your Girl Doll
Before beginning your amigurumi project, gather these supplies:
- Baby Cotton yarn in:
- Pastel Purple (#13) – 1 skein (for dress and headbands)
- Cream (#02) – 1 skein (for head, body, arms, and legs)
- Grey (#05) – 1 skein (for hair and buns)
- Sky Blue (#07) – 1 skein (for shoes)
- Crochet hook size 2.00 mm (6.B/1)
- Black scrap yarn for embroidering eyes
- Polyester fiberfill for stuffing
- Tapestry needle for assembly
- Scissors
- Stitch markers (optional)
Understanding Girl Doll Terminology
Familiarize yourself with these standard abbreviations used throughout the pattern:
- sc = single crochet
- sl st = slip stitch
- mr = magic ring
- dc = double crochet
- hdc = half double crochet
- inc = increase (2 single crochet in same stitch)
- dec = decrease (2 stitches worked together)
- rnd = rounds
- fl = front loop
- tbl = through back loop
- ch = chain
- ( ) = repeat what’s in the brackets
Girl Doll Important Tips Before Starting
- All parts except the headbands are worked in continuous spirals without joining
- Stuff the head and body firmly for better shape retention
- Fill the arms very lightly for a more graceful, poseable look
- Work stitches tightly to prevent gaps and stuffing from showing through
- Use stitch markers to keep track of your rounds
- Take time with the facial features as they give your doll her personality
Creating Your Girl Doll Step by Step
Girl Doll Head
Using Cream yarn:
- Create a magic ring and work 6 sc into it (6)
- Increase in each stitch around (12)
- [1 sc, increase] repeat 6 times (18)
- [2 sc, increase] repeat 6 times (24)
- [3 sc, increase] repeat 6 times (30)
- [4 sc, increase] repeat 6 times (36)
- [5 sc, increase] repeat 6 times (42)
- [6 sc, increase] repeat 6 times (48)
- [7 sc, increase] repeat 6 times (54)
- [8 sc, increase] repeat 6 times (60) 11-20. Work 1 sc in each stitch for 10 rounds (60)
- [8 sc, decrease] repeat 6 times (54)
- [7 sc, decrease] repeat 6 times (48)
- [6 sc, decrease] repeat 6 times (42)
- [5 sc, decrease] repeat 6 times (36)
- [4 sc, decrease] repeat 6 times (30)
- [3 sc, decrease] repeat 6 times (24)
- [2 sc, decrease] repeat 6 times (18)
Fasten off, leaving a long tail for sewing. Stuff the head firmly with fiberfill.
Girl Doll Hair
Using Grey yarn:
- Create a magic ring and work 6 sc into it (6)
- Increase in each stitch around (12)
- [1 sc, increase] repeat 6 times (18)
- [2 sc, increase] repeat 6 times (24)
- [3 sc, increase] repeat 6 times (30)
- [4 sc, increase] repeat 6 times (36)
- [5 sc, increase] repeat 6 times (42)
- [6 sc, increase] repeat 6 times (48)
- [7 sc, increase] repeat 6 times (54)
- [8 sc, increase] repeat 6 times (60) 11-22. Work 1 sc in each stitch for 12 rounds (60)
Fasten off, leaving a long tail for attaching to the head.
Hair Buns (Make 2)
Using Grey yarn:
- Create a magic ring and work 6 sc into it (6)
- Increase in each stitch around (12)
- [1 sc, increase] repeat 6 times (18)
- [2 sc, increase] repeat 6 times (24)
- [3 sc, increase] repeat 6 times (30)
- [4 sc, increase] repeat 6 times (36) 7-12. Work 1 sc in each stitch for 6 rounds (36)
- [4 sc, decrease] repeat 6 times (30)
- [3 sc, decrease] repeat 6 times (24)
- [2 sc, decrease] repeat 6 times (18)
Finish with a slip stitch. Fasten off, leaving a long tail for attaching to the head. Stuff each bun firmly.
Shoes and Legs (Make 2)
Using Sky Blue yarn:
- Create a magic ring and work 6 sc into it (6)
- Increase in each stitch around (12)
- [1 sc, increase] repeat 6 times (18)
- [2 sc, increase] repeat 6 times (24)
- Work 1 sc through back loop in each stitch (24) 6-9. Work 1 sc in each stitch for 4 rounds (24)
- Decrease 5 times, 14 sc (19)
- Decrease 4 times, 11 sc (15) 12-13. Work 1 sc in each stitch for 2 rounds (15)
Work 10 sc to end at the back of the foot where the color change won’t be visible. Change to Cream yarn: 14-41. Work 1 sc in each stitch for 28 rounds (15)
Stuff the foot firmly and fill the leg more lightly. Fasten off, leaving a long tail for attaching to the body.
Body
Using Cream yarn:
- Create a magic ring and work 6 sc into it (6)
- Increase in each stitch around (12)
- [1 sc, increase] repeat 6 times (18)
- [2 sc, increase] repeat 6 times (24)
- [3 sc, increase] repeat 6 times (30)
- [4 sc, increase] repeat 6 times (36)
- [5 sc, increase] repeat 6 times (42)
- [6 sc, increase] repeat 6 times (48) 9-17. Work 1 sc in each stitch for 9 rounds (48)
- [6 sc, decrease] repeat 6 times (42) 19-20. Work 1 sc in each stitch for 2 rounds (42)
- [5 sc, decrease] repeat 6 times (36) 22-23. Work 1 sc in each stitch for 2 rounds (36)
- [4 sc, decrease] repeat 6 times (30) 25-28. Work 1 sc in each stitch for 4 rounds (30)
- [3 sc, decrease] repeat 6 times (24)
Change to Pastel Purple yarn: 30-33. Work 1 sc in each stitch for 4 rounds (24) 34. Work 1 sc through back loop in each stitch (24) 35-36. Work 1 sc in each stitch for 2 rounds (24) 37. [2 sc, decrease] repeat 6 times (18) 38-39. Work 1 sc in each stitch for 2 rounds (18)
Fasten off. Stuff the body firmly with fiberfill.
Dress
Using Pastel Purple yarn, with the body turned upside-down, work into the front loops of round 34 of the body:
- Increase in each stitch around (48)
- [1 sc, increase] repeat to the end of the round (72) 3-14. Work 1 hdc in each stitch for 12 rounds (72)
- Work 1 sc in each stitch in front loop only (72)
- Create a shell stitch edge: [skip 2 stitches, 5 dc in next stitch, skip 2 stitches, 1 sc] repeat until you have 12 shells, finish with a slip stitch
Fasten off. Change to Cream yarn for the lower shell stitch edge: 17. Attach yarn to the back loops of round 15 and work 72 sc 18-19. Work 1 sc in each stitch for 2 rounds (72) 20. 2 sc, [skip 2 stitches, 5 dc in next stitch, skip 2 stitches, 1 sc] repeat until you have 12 shells, finish with a slip stitch
Fasten off.
Arms (Make 2)
Using Cream yarn:
- Create a magic ring and work 6 sc into it (6)
- Increase in each stitch around (12) 3-12. Work 1 sc in each stitch for 10 rounds (12)
Change to Pastel Purple yarn: 13. Increase in each stitch around (24) 14-18. Work 1 sc in each stitch for 5 rounds (24)
Stuff the arm very lightly as you work. 19. Decrease 12 times (12) 20-24. Work 1 sc in each stitch for 5 rounds (12) 25. [2 sc, decrease] repeat 3 times (9) 26. Work 1 sc in each stitch (9)
Fasten off, leaving a long tail for attaching to the body.
Headbands (Make 2)
Using Pastel Purple yarn:
- Chain 51, turn
- [1 sc, increase] repeat to the end of the chain (75)
Fasten off, leaving enough yarn for securing the headbands.
Assembly Instructions
- Stuffing: Make sure the head and body are firmly stuffed with fiberfill.
- Hair and Buns: Stuff both buns firmly. Sew the hair to the head, then attach the buns starting from round 6 as shown in the reference pictures.
- Facial Features:
- Embroider the eyes between rounds 16 and 17
- Create the nose right below the eye level, spanning across 3 stitches
- Legs: Sew the legs to the body at the 3rd round from the bottom. Ensure the toes are facing upward.
- Head and Body: Attach the head to the body, adding extra stuffing between them to prevent the head from tilting.
- Arms: Sew the arms to the top of the neck area.
- Headbands: Tie the headbands lightly around both buns.
Customization Ideas
While this pattern creates a lovely girl doll with double buns and a purple dress, consider these creative variations:
- Hair Color: Change the yarn color for different hair colors like blonde, brown, black, or even fun colors like pink or blue
- Dress Options: Create various dress styles and colors for different looks
- Accessory Additions: Add small crocheted accessories like a purse, flower, or small toy
- Facial Expressions: Vary the placement of the embroidered features for different expressions
- Size Adjustments: Use thicker yarn and a larger hook for a bigger doll, or thinner yarn and a smaller hook for a mini version
Perfect as a Gift
This girl doll amigurumi makes an excellent present for:
- Children who enjoy imaginative play
- Doll collectors of any age
- Nursery or child’s room decor
- Special occasions like birthdays or baby showers
- Craft fair or handmade market offerings
Care Instructions
To keep your girl doll amigurumi looking her best:
- Spot clean with mild soap and water
- Air dry completely
- Brush hair gently if needed
- Avoid direct sunlight to prevent color fading
- Store carefully to maintain shape and prevent dust accumulation
Check this out :Sports Turtle Amigurumi Complete Crochet Pattern
Conclusion
Creating this girl doll amigurumi allows you to craft a charming character with elegant details and sweet personality. The combination of the double bun hairstyle, layered dress with shell stitch detailing, and simple embroidered features results in a truly special handmade doll. Whether you’re making her for yourself or as a gift, this pattern offers a rewarding crochet experience and a lovable finished piece that’s sure to be treasured.
Happy crocheting!
This pattern has been adapted for clarity and SEO purposes while maintaining the original design’s integrity.
