

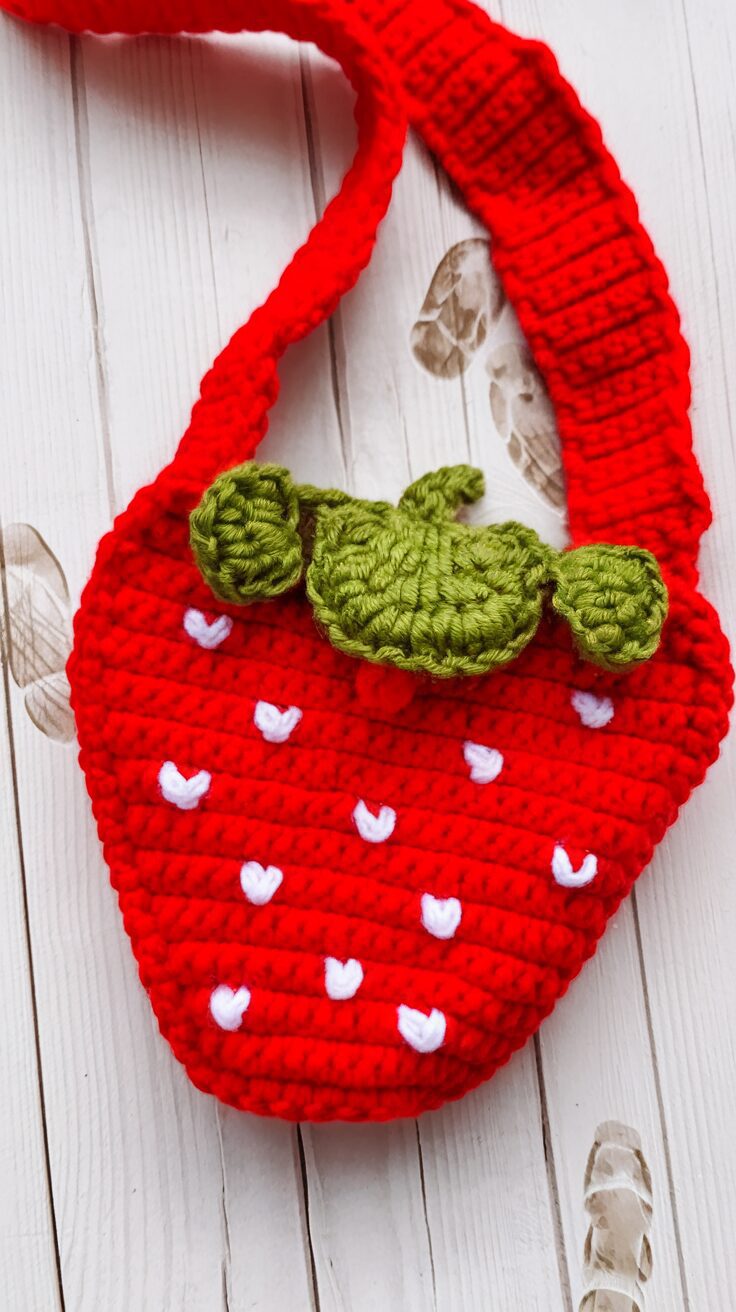
Looking for the perfect seasonal accessory to brighten your summer outfits? This adorable Crochet Strawberry Bag Pattern creates a charming mini purse that’s ideal for carrying your essentials to the beach, farmer’s market, or anywhere your summer adventures take you!
Just the right size for your phone and a few small items, this sweet strawberry bag makes a delightful statement piece that captures the essence of summer style. Whether you’re embracing cottagecore aesthetics or simply love fruit-themed accessories, this pattern delivers a fun, quick project with eye-catching results.
Why You’ll Love This Strawberry Bag Pattern
Strawberries have become incredibly popular in fashion and home decor, appearing everywhere from social media to retail stores. They perfectly embody the fresh, cheerful spirit of spring and summer, making them an ideal motif for seasonal accessories.
This strawberry bag pattern captures that seasonal charm in a functional accessory that’s just the right size for everyday essentials. The distinctive strawberry shape, complete with realistic green leafy top and embroidered “seeds,” creates an instantly recognizable and adorable finished piece.
What makes this pattern especially appealing is its versatility. You can easily adjust the size by changing your yarn weight, customize the strap length for your perfect fit, or even add fun embellishments like a smiling face for a kawaii-inspired look.
Things To Note Before You Begin
Yarn Choice: I used acrylic yarn for this strawberry bag pattern because it’s durable and holds its shape well, but you have plenty of options. Cotton yarn creates a sturdier bag with more structure, while chunky yarn would result in a larger strawberry purse. The choice depends on your personal preference and how you plan to use your bag.
Size Consideration: This pattern creates a mini bag designed to hold a phone and a few small necessities—think keys, lip balm, and perhaps a small wallet. It’s not intended for carrying heavy or bulky items, so think of it as a cute statement accessory rather than an everyday tote.
Adjustable Strap: One of the great features of this pattern is that you can easily customize the strap length. Whether you want the bag to sit high on your shoulder or lower on your hip, or if you’re making it for a child, you can adjust the number of rows in the strap section to achieve your perfect fit.
Materials Needed
- H hook (5mm)
- Tapestry needle for assembly and embroidery
- 1 skein of red yarn
- A small ball of green yarn
- A small ball of white yarn
- Stitch markers (optional but helpful)
Abbreviations (US Terms)
- Chains (ch)
- Magic ring (mr)
- Single crochet (sc)
- Double crochet (dc)
- Increase (inc) – 2 sc in same stitch
- Decrease (dec) – sc2tog
- Turning chain (turning ch)
Creative Variations for Your Strawberry Bag
While the classic red strawberry with green leaves is timeless, don’t be afraid to get creative with your project! Here are some ways to put your own spin on this pattern:
Size Adjustments: Use chunky yarn and a larger hook for a roomier strawberry tote, or fine yarn and a smaller hook for a dainty accessory or child’s bag.
Color Play: Try a pink strawberry for a softer look, or go wild with non-traditional colors like purple or blue for a fantasy strawberry that makes a bold statement.
Added Features: Consider these fun additions:
- Embroider a cute face for a kawaii-style strawberry
- Add a fabric lining for a more structured, finished look
- Include an inner pocket for small items
- Attach a strawberry keychain to the strap for extra charm
- Add a zipper or button closure for more security
Step-by-Step Instructions for Crochet Strawberry Bag Pattern
This pattern works up in several parts: making two identical strawberry sides, creating the leafy top, crafting the strap/sides, and then assembling everything together.
Crochet Strawberry Sides (Make 2)
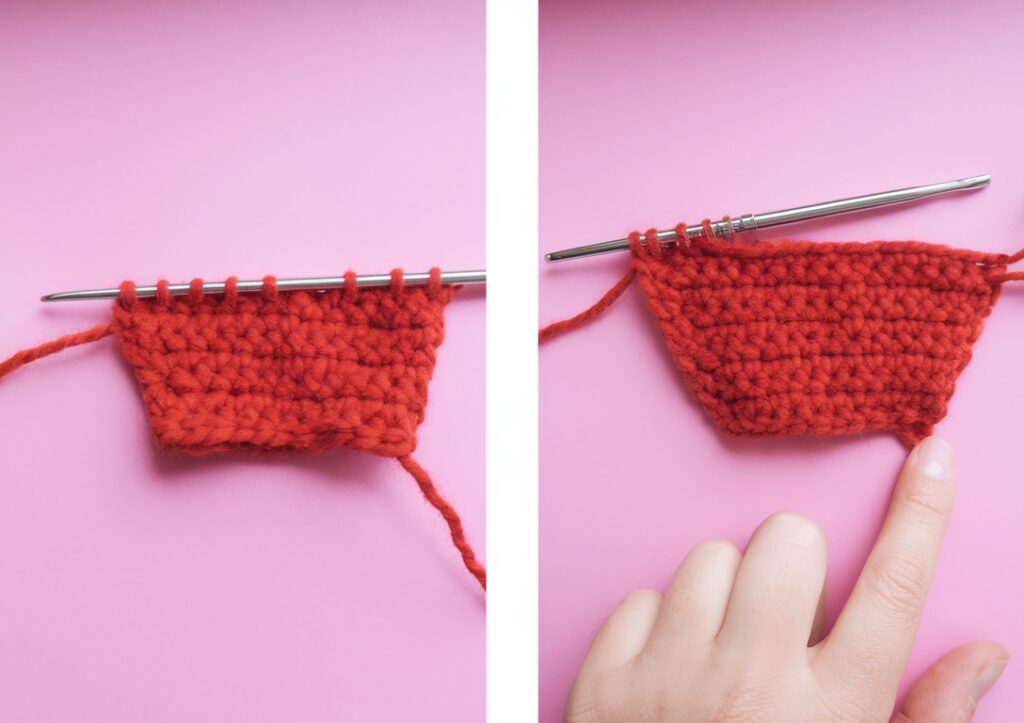
The main strawberry pieces are worked in rows, starting from the bottom point and working up to the wider top:
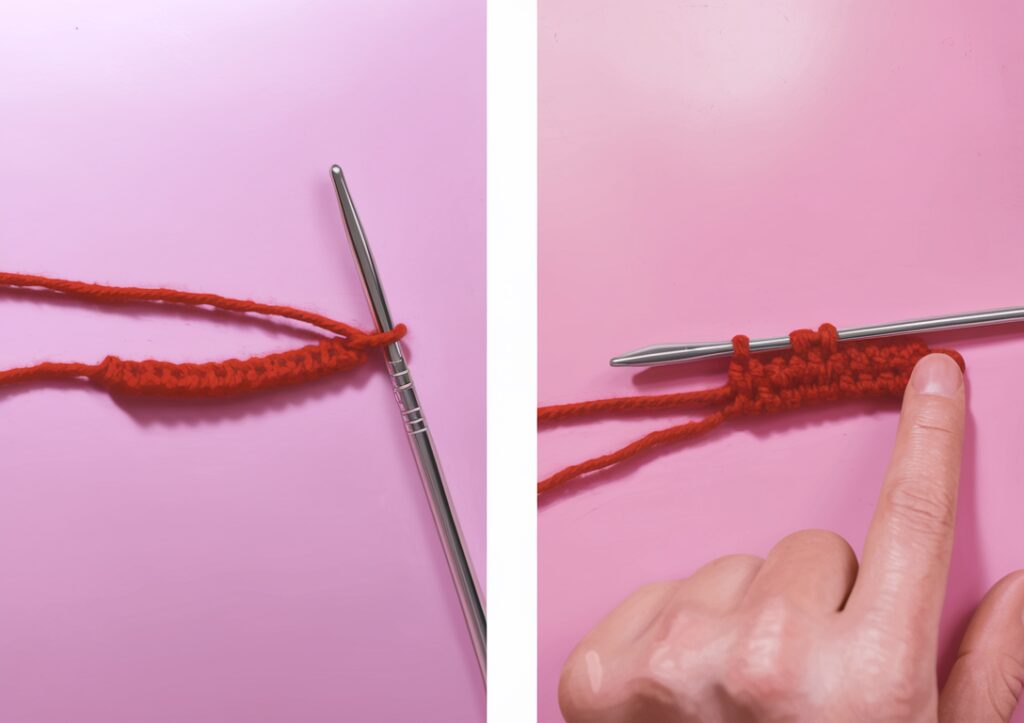
Row 1: Ch 10 + 1 turning ch (11). Turn.
Row 2: Skip the turning ch (always skip the turning ch), and make a sc. Continue making sc for the entire row. (10) Then ch 1 and turn.
Row 3: Inc, sc x8, inc. (12) Then ch 1 and turn.
Rows 4-5: Sc x12 (12). Then ch 1 and turn.
Row 6: Inc, sc x10, inc. (14) Then ch 1 and turn.
Row 7: Sc x14 (14). Then ch 1 and turn.
Row 8: Inc, sc x12, inc. (16) Then ch 1 and turn.
Row 9: Sc x16 (16). Then ch 1 and turn.
Row 10: Inc, sc x14, inc. (18) Then ch 1 and turn.
Row 11: Sc x18 (18). Then ch 1 and turn.
Row 12: Inc, sc x16, inc. (20) Then ch 1 and turn.
Row 13: Sc x20 (20). Then ch 1 and turn.
Row 14: Inc, sc x18, inc. (22) Then ch 1 and turn.
Rows 15-17: Sc x22 (22). Then ch 1 and turn.
Row 18: Inc, sc x20, inc. (24) Then ch 1 and turn.
Row 19: Sc x24 (24). Then ch 1 and turn.
Row 20: Inc, sc x22, inc. (26) Then ch 1 and turn.
Rows 21-24: Sc x26 (26). Then ch 1 and turn.
Row 25: Dec, sc x22, Dec (24). Then ch 1 and turn.
Row 26: Dec, sc x20, Dec (22). Then ch 1 and turn.
Row 27: Dec, sc x18, Dec (20). Then ch 1 and turn.
Row 28: Dec, sc x16, Dec (18). Then ch 1 and turn.
Fasten off and weave in ends.
Crochet Strawberry Leaves
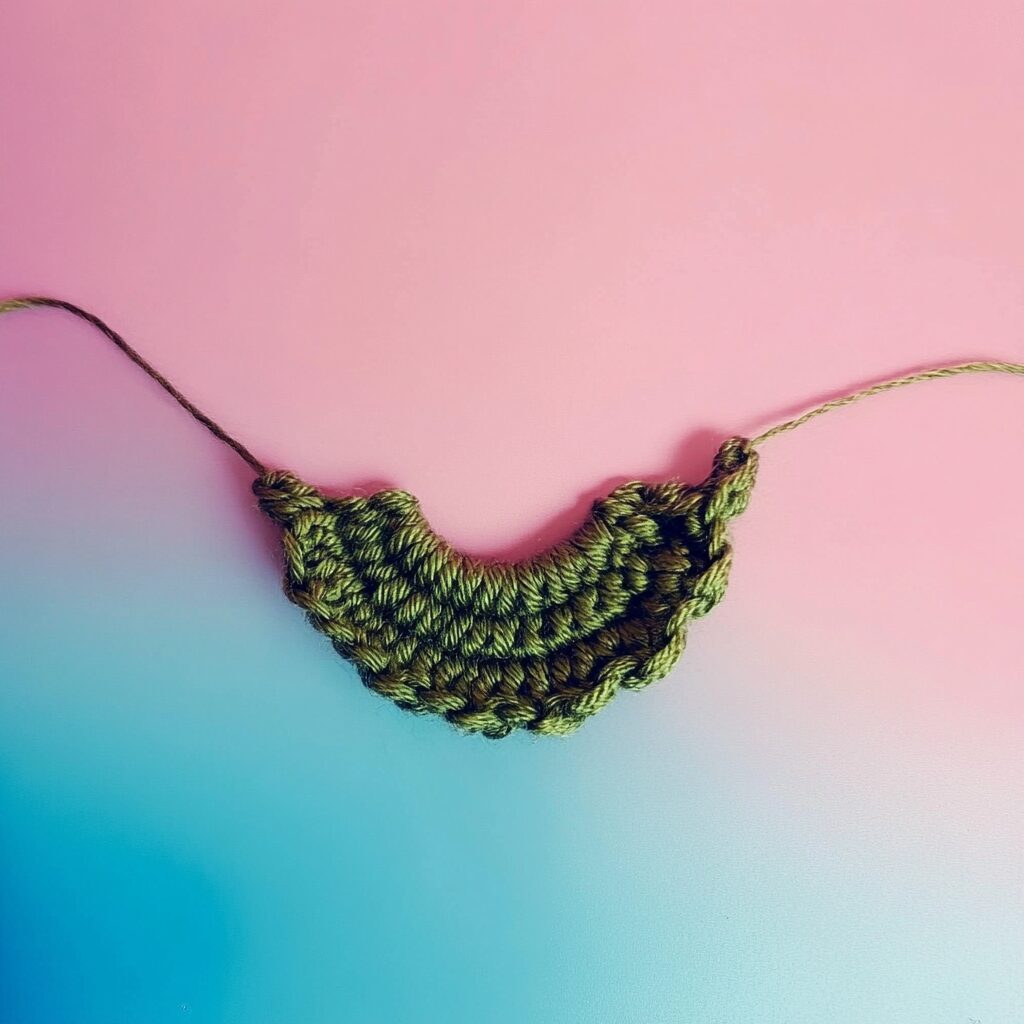
Middle Leaves (Make 2)
These are the larger, center leaves of the strawberry top.
Round 1: Make a magic ring, then dc x6. (6) Ch 2 and turn. DO NOT JOIN THE CIRCLE.
Round 2: Inc in every stitch (12). Ch 2 and turn.
Round 3: Inc, dc and repeat for the entire round (18). Fasten off and weave in the ends.
Tiny Outer Edge Leaves (Make 4)
These smaller leaves will frame the larger center leaves.
Round 1: Ch 5 (5) + 2 turning chs.
Round 2: Skip 2 chs and make a dc. Make another 4 dcs in the following chs. Make another dc in the last stitch to help turn it to the other side of the ch. Then make dc x5 for the following chains. Fasten off and weave in the ends.
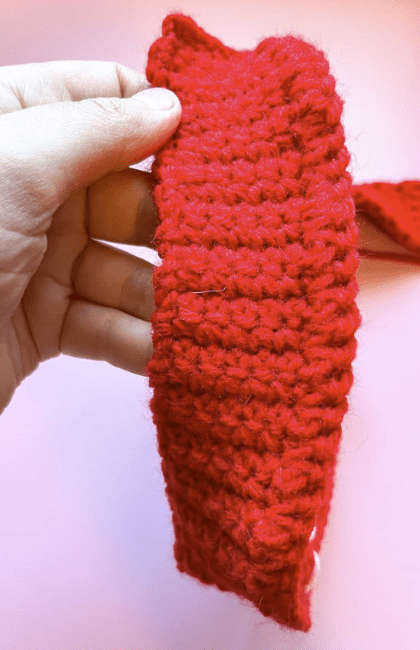
Crochet Strawberry Strap & Sides
This piece forms both the sides of the bag and the carrying strap. While the row count seems high, it works up quickly:
Row 1: Ch 6 + 1 turning ch (7) and turn.
Row 2: In the second ch from hook make a sc. Continue to make sc in each ch. (6)
Rows 3-175: Sc x6 (6). Ch 1 and turn.
You may need to adjust the number of rows depending on your desired strap length. Remember that this piece will surround both strawberry sides, so it needs to be long enough for the circumference of the bag plus the strap.
Fasten off but don’t weave in the ends yet, as you may need to adjust the length during assembly.
Assembling Your Strawberry Bag
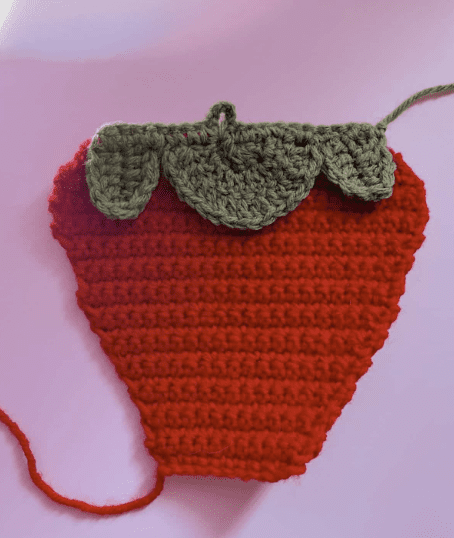
Attaching the Leaves to the Strawberry
- Position the leaves at the top of one strawberry piece: place a small leaf, then a large middle leaf, then another small leaf, creating a classic strawberry leaf arrangement.
- Use green yarn to join the leaves to the strawberry by working sc through both pieces.
- Work across the top edge, going through both the strawberry edge and the closest point on the leaf edges.
- When you reach about halfway across (after 8-9 sc), ch 5 and attach back to the same stitch with a sc. This creates a loop for hanging or securing the bag.
- Continue attaching the remaining leaves with sc.
- Repeat this process for the second strawberry piece, but instead of a simple chain loop, create a decorative closure:
- At the halfway point, ch 4
- In the second chain from hook, make a bobble stitch: (Yarn over, insert hook in stitch, yarn over, pull through, yarn over, pull through 2 loops) repeat 5 times, yarn over, pull through all 6 loops on hook
- Sc into the chain you made before the bobble
- Continue sc along the rest of the edge
Embroidering the Seeds
Using white yarn (doubled for better visibility), embroider small “V” shapes scattered across both strawberry pieces to represent seeds. Place them randomly for a natural look.
Joining the Sides and Strawberry Pieces
- With the embroidery and leaves facing outward, align one edge of a strawberry piece with one end of the strap/side piece.
- Using red yarn, insert your hook through both pieces and work sc along the entire edge.
- Continue around the curved bottom of the strawberry.
- When you reach the opposite side, fasten off and weave in ends.
- Repeat for the second strawberry piece on the other end of the strap.
- Finally, determine the desired length of your strap (try it on to check), then sew the remaining strap end to the inside of the bag with your tapestry needle.
Once all pieces are attached and ends are woven in, your strawberry bag is complete!
Expert Tips for Strawberry Bag Success
Yarn Selection: Choose a yarn that matches your intended use. Acrylic offers durability and wash-ability, while cotton provides structure and a more defined stitch pattern. For a luxurious touch, consider a cotton-acrylic blend that combines the best of both fibers.
Tension Matters: Maintain consistent tension throughout your project for the most professional-looking result. The strawberry shape depends on gradual increases and decreases, which look best when worked with even tension.
Embroidery Enhancement: When adding the white seed “Vs,” use doubled yarn for better visibility and durability. Work from the back to the front, securing each stitch well so they won’t pull out during use.
Structural Support: If you want your bag to hold its shape better, consider adding a plastic canvas or cardboard insert to the bottom, or fully lining the bag with fabric.
Strap Comfort: For a more comfortable strap, consider working it in a half-double crochet instead of single crochet, which creates a slightly thicker, softer band. You can also add a fabric tube over the strap portion for extra comfort.
Common Questions About the Strawberry Bag Pattern
Can I use different yarn weights?
Absolutely! The pattern works well with various yarn weights, each creating a different final size:
- Worsted weight (as written) creates a mini bag perfect for essentials
- DK or sport weight results in a dainty strawberry purse ideal for children
- Chunky or bulky yarn makes a larger tote that can hold more items
- Cotton yarn creates a sturdier bag with excellent stitch definition
Remember to adjust your hook size accordingly when changing yarn weights.
How can I adjust the size of the bag?
There are several ways to modify the size:
- Change yarn weight and hook size as mentioned above
- Add more increase rows at the beginning and straight rows in the middle for a longer strawberry
- Work additional increase rows without corresponding decrease rows for a wider top
- For a larger bag with the same proportions, try working the pattern with two strands of yarn held together
Can I wash my crochet bag?
Yes, but with care. For acrylic yarn bags, hand washing in cool water with mild soap is best. Gently squeeze out excess water (don’t wring) and reshape while damp. Allow to air dry flat on a towel.
For cotton or natural fiber bags, follow the same process but be extra gentle, as wet natural fibers can be heavier and stretch more easily. If you’ve added embroidery or embellishments, be particularly careful to avoid snagging.
Why This Strawberry Bag Pattern Stands Out
What makes this strawberry bag pattern special is its perfect balance of whimsy and functionality. The distinctive shape is instantly recognizable, making it a delightful conversation starter wherever you go. Yet unlike purely decorative crochet projects, this bag serves a practical purpose, carrying your small essentials in sweet style.
The construction method—creating two flat strawberry pieces and joining them with a continuous strap/side piece—is clever and efficient, minimizing the need for complex shaping or extensive seaming. This approach makes the pattern accessible even to crocheters with intermediate skills.
The leafy top detail and embroidered seeds elevate the design from simple to spectacular, adding those finishing touches that make handmade items truly special. Whether you’re making this bag for yourself or as a thoughtful gift, the result is sure to bring smiles.
More Summer Crochet Patterns to Try
If you enjoy making this strawberry bag, you might also like these related summer-themed crochet patterns:
- Crochet Strawberry Keychain – A miniature version perfect for bag charms or keys
- Crochet Bubble Tea Amigurumi – Another sweet summer-inspired project
- Crochet Lemonade Pattern – Refreshing summer decor
- Crochet Lemon Pattern – A citrusy companion to your strawberry creations
- Crochet Orange Pattern with Leaf – Complete your fruit collection
Each of these patterns captures the bright, cheerful spirit of summer, allowing you to create a collection of seasonal accessories and decorations.
Happy crocheting, and don’t forget to share your finished strawberry bag creations! I’d love to see your color choices and any creative modifications you make to the pattern.
