

Table of Contents
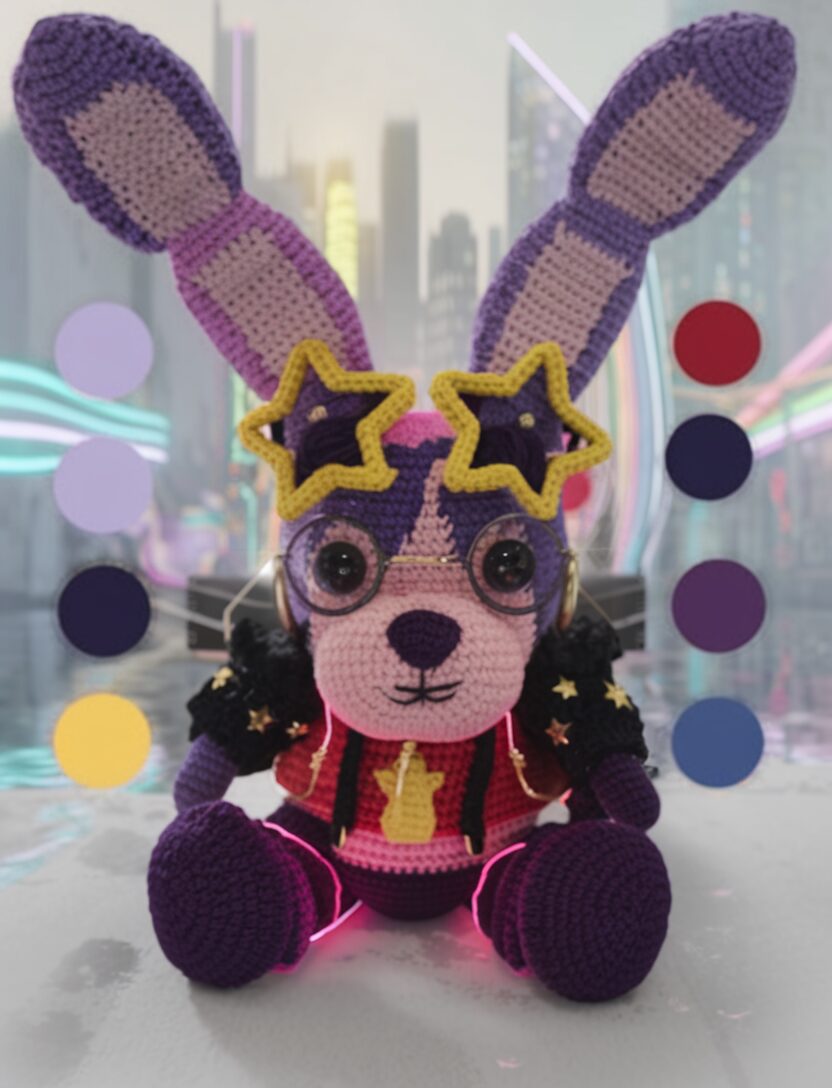
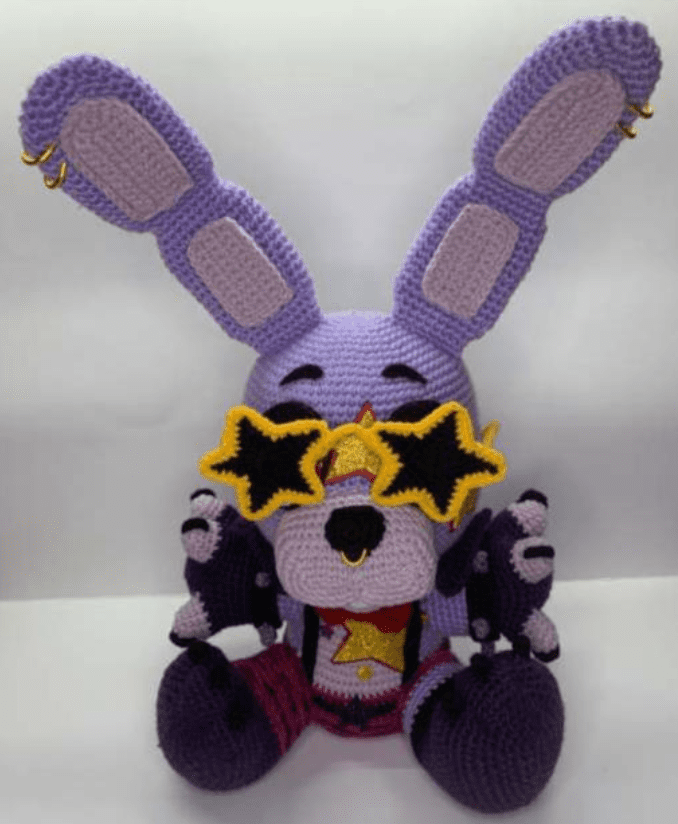
This pattern creates a detailed Glamrock Bonnie amigurumi that stands approximately 35cm (11in) tall including the ears. With clear instructions for every component, you’ll be able to create this rockstar bunny complete with star-shaped glasses, stylish accessories, and all the signature details fans love.
Materials
Yarn
- Schachenmayr Soft & Easy
- Color 0047 (lilac/base purple): one skein
- Color 0031 (fuchsia/magenta): half skein
- Color 0049 (eggplant): half skein
- Alize Baby Best
- Color 106 (carmine red): less than half skein
- Color 060 (black): less than half skein
- YarnArt Jeans
- Light purple (color 19)
- White (color 62)
- Black (color 53)
- Gray (color 46)
Note: You can substitute these yarns with similar colors and weights, but this may affect the final size of your Glamrock Bonnie Amigurumi .
Additional Materials
- Gold aluminum wire
- Pliers for wire work
- Fabric glue/craft glue (UHU Kraft recommended)
- 2.5mm crochet hook
- Tapestry needle
- Polyester fiberfill for stuffing
- Sheet felt in black, magenta, white
- Glitter EVA foam in black and gold
- Black acrylic paint
Felt Accessories
- Magenta: iris, star patch
- Black: eyebrows, suspenders
- White: teeth
Glitter EVA Foam
- Black: eyelids
- Gold: star patches (matching the magenta felt ones)
Abbreviations
- MR – Magic ring
- sc – Single crochet
- slst – Slip stitch
- ch – Chain stitch
- inc – Increase (2 sc in same stitch)
- dec – Decrease
- invdec – Invisible decrease (insert hook under front loops of next 2 stitches and draw yarn through both)
- BLO – Back loop only
- FLO – Front loop only
- hdc – Half double crochet
- dc – Double crochet
- tc – Triple crochet
- FO – Fasten off
- sk a st – Skip a stitch
- * – Repeat instructions
Pattern Instructions
Head and Body
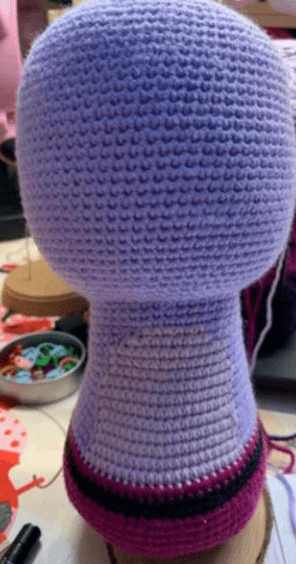
Start with lilac/base purple yarn:
Round 1: 6 sc in MR [6]
Round 2: 6 inc [12]
Round 3: (sc, inc)*6 [18]
Round 4: sc, inc, (2sc, inc)*5, sc [24]
Round 5: (3sc, inc)*6 [30]
Round 6: 2sc, inc, (4sc, inc)*5, 2sc [36]
Round 7: (5sc, inc)*6 [42]
Round 8: 3sc, inc, (6sc, inc)*5, 3sc [48]
Round 9: (7sc, inc)*6 [54]
Round 10: 4sc, inc, (8sc, inc)*5, 4sc [60]
Round 11: (9sc, inc)*6 [66]
Round 12: 5sc, inc, (10sc, inc)*5, 5sc [72]
Round 13: (11sc, inc)*6 [78]
Rounds 14-35: 78sc [78] (22 rounds)
Round 36: (11sc, invdec)*6 [72]
Round 37: 5sc, invdec, (10sc, invdec)*5, 5sc [66]
Round 38: (9sc, invdec)*6 [60]
Round 39: 4sc, invdec, (8sc, invdec)*5, 4sc [54]
Round 40: (7sc, invdec)*6 [48]
Round 41: 3sc, invdec, (6sc, invdec)*5, 3sc [42]
Round 42: slst around [42]
Round 43: work in the slipstitches; 42sc [42]
Rounds 44-45: 42sc [42] (2 rounds)
Round 46: 18sc, 6sc, 18sc [42]
Round 47: 3sc, (inc, 6sc)*2, inc, 6sc, inc, (6sc, inc)*2, 3sc [48]
Rounds 48-49: 17sc, 14sc, 17sc [48] (2 rounds)
Round 50: (7sc, inc)*2, (7sc, inc)*2, (7sc, inc)*2 [54]
Rounds 51-53: 18sc, 18sc, 18sc [54] (3 rounds)
Round 54: (8sc, inc)*2, (8sc, inc)*2, (8sc, inc)*2 [60]
Round 55: 20sc, 20sc, 20sc [60]
Round 56: (9sc, inc)*2, (9sc, inc)*2, (9sc, inc)*2 [66]
Rounds 57-58: 22sc, 22sc, 22sc [66] (2 rounds)
Change to magenta yarn:
Round 59: 66sc [66]
Change to black yarn:
Round 60: 66sc [66]
Change to magenta yarn:
Round 61: (10sc, inc)*6 [72]
Change to lighter purple yarn:
Rounds 62-63: 72sc [72] (2 rounds)
Round 64: (11sc, inc)*6 [78]
Rounds 65-66: 78sc [78] (2 rounds)
Round 67: (11sc, invdec)*6 [72]
Round 68: (10sc, invdec)*6 [66]
Round 69: (9sc, invdec)*6 [60]
Round 70: (8sc, invdec)*6 [54]
Round 71: (7sc, invdec)*6 [48]
Round 72: (6sc, invdec)*6 [42]
Round 73: (5sc, invdec)*6 [36]
Round 74: (4sc, invdec)*6 [30]
Round 75: (3sc, invdec)*6 [24]
Round 76: (2sc, invdec)*6 [18]
Round 77: (sc, invdec)*6 [12]
Round 78: (invdec)*6 [6]
Using the front loops only, close the gap with a tapestry needle, fasten off, and hide the tail inside the body.
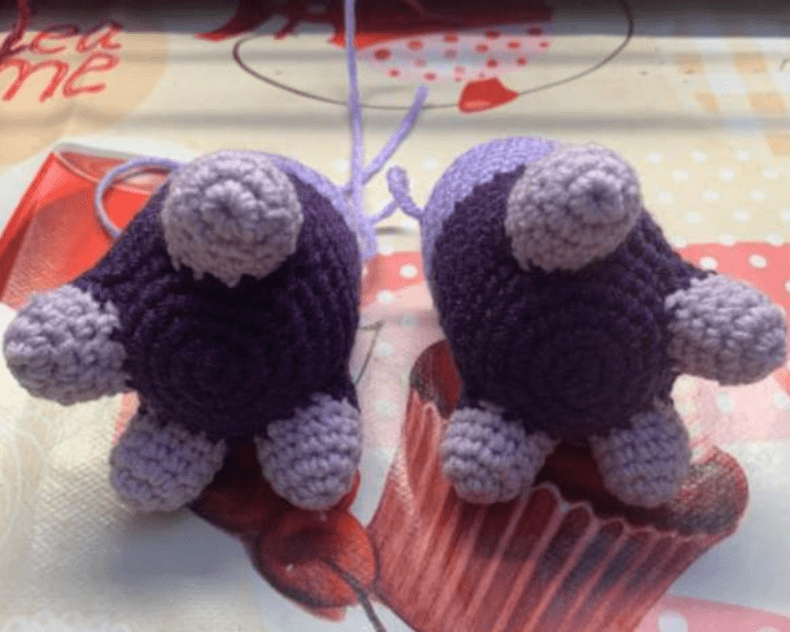
Ears (Make 2)
Use body purple yarn:
Round 1: 6sc in MR [6]
Round 2: 6 inc [12]
Round 3: (sc, inc)*6 [18]
Round 4: sc, inc, (2sc, inc)*5, sc [24]
Rounds 5-19: 24sc [24] (15 rounds)
Cut a piece of cardboard, firm felt, or foam in the shape of the ears (4 pieces total) for stability
Round 20: 2invdec, 7sc, 2invdec, 9sc [20]
Round 21: invdec, 7sc, invdec, 9sc [18]
Flatten the ears so the decreases are on the sides. Put the previously cut material inside them for support
Round 22: 18sc [18]
Round 23: inc, 7sc, inc, 9sc [20]
Round 24: 2inc, 7sc, 2inc, 9sc [24]
Rounds 25-36: 24sc [24] (12 rounds)
Round 37: 2invdec, 8sc, 2invdec, 8sc [20]
Round 38: invdec, 8sc, invdec, 8sc [18]
Round 39: 18sc [18]
Insert the second bracing inside, then fasten off and leave a long tail for sewing.
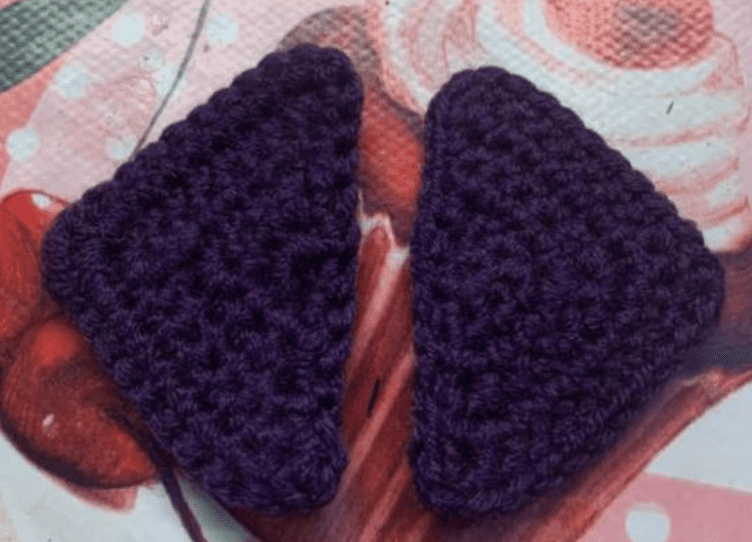
Ear Patches (Make 2 of Each)
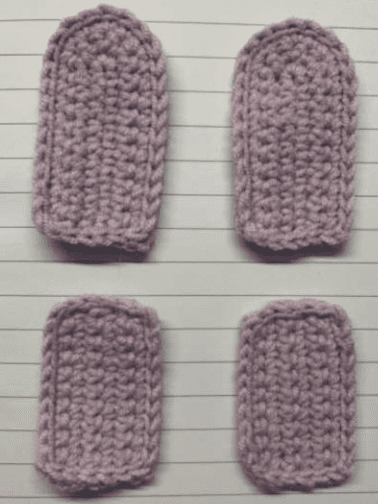
Use lighter purple yarn:
Upper Part (Make 2)
Row 1: ch11, turn (crochet in the back bumps) 9sc, 4sc in the last stitch, 9sc, turn [22]
Row 2: ch1, 9sc, 3inc, 10sc, turn [25]
Row 3: ch1, 10sc, (inc, sc)*3, 9sc [28]
Row 4: slst around, FO
Lower Part (Make 2)
Row 1: ch11, turn
Rows 2-6: 10sc, ch1, turn [10]
Row 7: slst around, FO
Muzzle
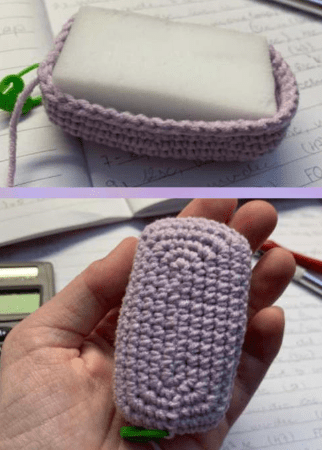
Use lighter purple yarn:
Row 1: ch10, turn, start to crochet in the second chain from the hook, and crochet only in the back bumps
Row 2: inc, 7sc, 4sc in the last stitch, continue on the other side, 7sc, inc, slst [22]
Row 3: ch1, sc, inc, 8sc, inc, sc, inc, 8sc, inc, sc, slst [27]
Row 4: ch1, sc, (3sc in one loop), 9sc, (3sc in one loop), 2sc, (3sc in one loop), 10sc, (3sc in one loop), sc, slst [35]
Row 5: 2sc, (3sc in one loop), 11sc, (3sc in one loop), 4sc, (3sc in one loop), 12sc, (3sc in one loop), 2sc, slst [43]
Row 6: ch1, 3sc, (3sc in one loop), 13sc, (3sc in one loop), 6sc, (3sc in one loop), 14sc, (3sc in one loop), 3sc [51]
Start to crochet in spiral
Rounds 7-8: 51sc [51]
Round 9: 12sc, invdec, 10sc, invdec, 12sc, invdec, 9sc, invdec [47]
Round 10: 47sc [47]
FO, leave a long tail for sewing. Cut a piece of thick foam or sponge to stuff the muzzle with, so it will keep its shape.
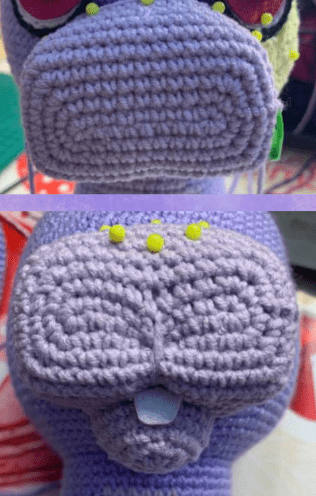
Sew the muzzle on the head, between rounds 24 and 36. You can make the upper part a little less angular with a bit of stuffing. With the remaining tail, pull the shaping of the muzzle as shown in the pictures, from the middle of the muzzle to the under part of it. Do this 2-3 times to strengthen it.
Jaw of the Glamrock Bonnie Amigurumi
Use lighter purple yarn:
Round 1: 24sc on the surface [24]
Rounds 2-3: 24sc [24]
Round 4: (2sc, invdec)*6 [18]
Start to stuff
Round 5: (sc, invdec)*6 [12]
Using the front loops only, pull the gap closed with a tapestry needle
Cut a piece of white felt, and customize it to fit the shape of Bonnie’s mouth, or to your liking
Nose of the Glamrock Bonnie Amigurumi

Use black yarn:
Round 1: 6sc in MR [6]
Round 2: sc, (3sc in one loop), sc, (3sc in one loop), sc, (3sc in one loop) [12]
Round 3: 3sc, (3sc in one loop), 2sc, (3sc in one loop), 3sc, (3sc in one loop), sc [18]
FO, leave a long tail for sewing.
Bow Tie of the Glamrock Bonnie Amigurumi

Use red yarn:
Row 1: ch11, turn
Row 2: sc on the 2nd chain from the hook, 10sc, turn [10]
Rows 3-9: ch1, 10sc [10]
Row 10: slst around, FO
Ribbon for the Bow Tie’s Middle
Row 1: ch8, turn
Row 2: sc on the 2nd chain from the hook, 7sc [7]
FO, leave a long tail for connecting the bow tie.
Scrunch up the bigger rectangle, then wrap the ribbon around in the middle. Sew the ribbon’s two sides together at the back.
Eyes (Make 2)
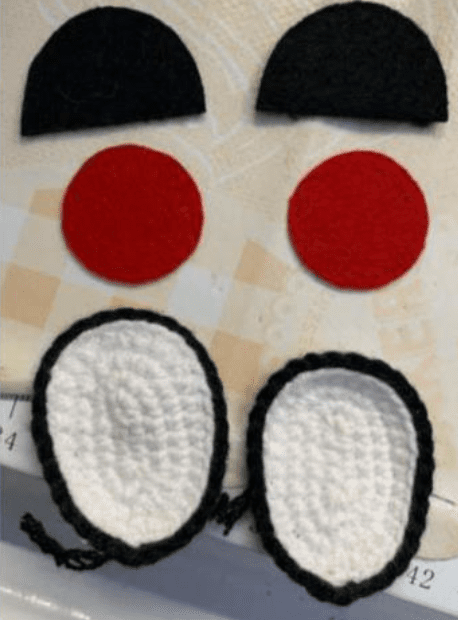
Use white yarn with a smaller hook:
Row 1: ch5, turn (start crocheting in the back bumps) inc, 2sc, 4sc in the last loop, continue on the other side, 2sc, inc, slst [12]
Row 2: ch1, 2inc, 3sc, inc, 4sc, inc, slst [19]
Row 3: ch1, 2inc, 6sc, 4inc, 6sc, inc, slst [26]
Row 4: ch1, sc, inc, 5sc, 4hdc, hdc inc, 3hdc, hdc inc, 4hdc, 5sc, inc, slst [30]
In the next round, change to black, and crochet in the back loops only
Round 5: BLO, slst around [30]
FO
Using the crocheted eye whites as guides, cut the eyelids, irises, and pupils from felt or EVA foam in the respective colors
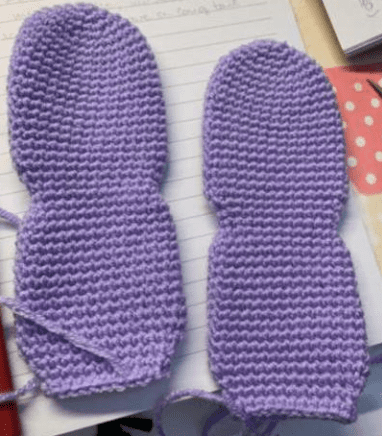
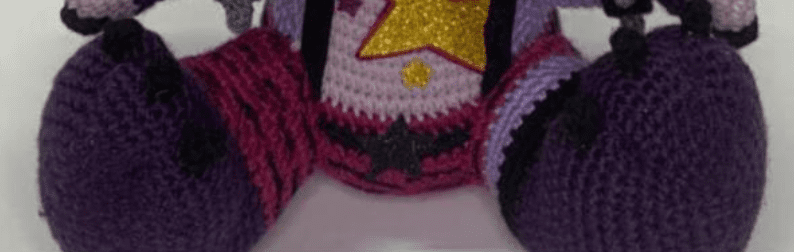
Legs (Make 2, Left and Right)
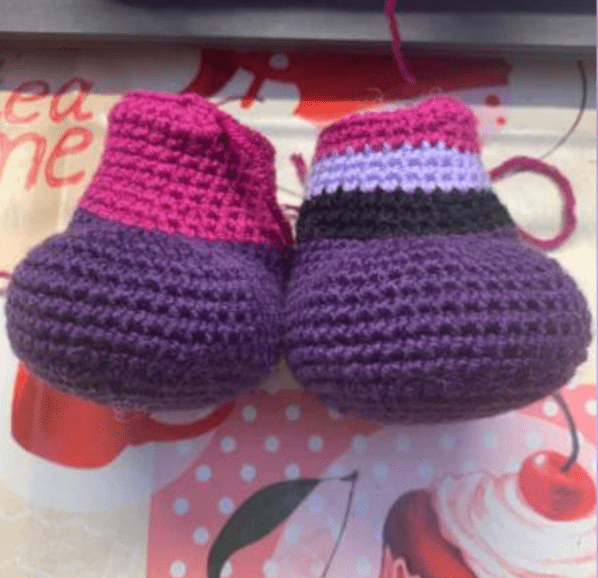
Start with dark purple yarn:
Row 1: ch6, turn, (crochet in the back bumps) 4sc, 4sc in the last stitch, (continue on the other side) 4sc, slst in the first stitch [12]
Row 2: ch1, inc, 4sc, 4inc, 3sc, inc, slst [19]
Row 3: ch1, inc, 4sc, (inc, sc)*4, 5sc, inc, slst [25]
Row 4: ch1, 6sc, (inc, sc)*6, 6sc, inc, slst [32]
Row 5: ch1, 6sc, (inc, sc)*3, 6sc, (sc, inc)*3, 6sc, 2inc, slst [40]
Row 6: ch1, inc, 8dc, (inc, 2sc)*6, inc, 8sc, inc, 2sc, inc, slst [50]
Row 7: ch1, (inc, 8sc, inc, 6sc)*3, 2inc, slst [58]
Row 8: ch1, 20sc, (dec, 5sc)*2, dec, 20sc, dec, slst [54]
Rounds 9-13: 54sc [54] (5 rounds)
Round 14: 18sc, 3invdec, 6sc, 3invdec, 18sc [48]
Round 15: 18sc, 6invdec, 18sc [42]
Round 16: 15sc, 6invdec, 15sc [36]
LEFT Leg
Change to black yarn:
Rounds 17-18: 36sc [36] (2 rounds)
Round 19: (4sc, invdec)*6 [30]
Change to body purple yarn:
Rounds 20-22: 30sc [30] (3 rounds)
Change to magenta yarn:
Round 23: 30sc [30]
Round 24: 15sc, slst, turn
Round 25: skip slst, dec, 12sc, slst, turn
Round 26: skip slst, dec, 11sc, continue with 2sc on side, 14sc, 2sc on side, slst, FO
RIGHT Leg
Change to magenta yarn:
Rounds 17-18: 36sc [36] (2 rounds)
Round 19: (4sc, invdec)*6 [30]
Rounds 20-23: 30sc [30] (4 rounds)
Round 24: slst, turn, skip slst, 15sc, slst, turn
Round 25: skip slst, dec, 11sc, dec, continue with 2sc on side, 14sc, 2sc on side, slst, FO
Toe Nails (Make 6)
Use black yarn:
Round 1: 3sc in MR [3]
Round 2: inc, sc, inc [5]
FO, sculpt them with your scissors, or something thin.
Fingers (Make 8)
Use lighter purple yarn:
Round 1: 6sc in MR [6]
Round 2: 6inc [12]
Rounds 3-5: 12sc [12] (3 rounds)
FO
Palms (Make 2)
Use dark purple yarn:
Round 1: 6sc in MR [6]
Round 2: 6inc [12]
Round 3: (sc, inc)*6 [18]
Round 4: sc, inc, (2sc, inc)*5, sc [24]
In the next round, we will start attaching the fingers, continue crocheting with purple yarn until stated otherwise. Also, we will start to make differences between left and right
LEFT ARM of the Glamrock Bonnie Amigurumi
Round 5: 3sc, (inside the finger, and through the palm, and do the same with the boldly marked stitches) sc, 3sc, sc, 3sc, 3sc, 3sc, 7sc [24]
In the next round we will crochet around the fingers as well, so the hand starts to take shape
Round 6: 9sc on first finger, sc, 9sc on second finger, sc, 9sc on third finger, 3sc on palm, 9sc on fourth finger, 7sc [48]
Round 7: 48sc [48]
Round 8: 3sc, invdec, (6sc, invdec)*5, 3sc [42]
Round 9: 7sc, (2invdec, 5sc)*2, 2invdec, 13sc [36]
Round 10: 6sc, 6invdec, 18sc [30]
Rounds 11-12: 30sc [30] (2 rounds)
Round 13: 26sc, change to body purple, 4sc [30]
Rounds 14-16: 30sc [30] (3 rounds)
Round 17: 24sc, 6slst [30]
Round 18: 2slst, 6sc, 5hdc, 17sc [30]
Round 19: 7sc, 3invdec, 17sc [27]
FO, leave a long tail for sewing.
RIGHT ARM of the Glamrock Bonnie Amigurumi
As opposite of the left arm, we will start with the thumb, and the marked stitches go both inside fingers, and through palm, just as before
Round 5: 3sc, 3sc, 3sc, sc, 3sc, sc, 3sc, 7sc [24]
Round 6: 9sc on first finger, 3sc, 9sc on second finger, sc, 9sc on third finger, sc, 9sc on fourth finger, 7sc [48]
Round 7: 48sc [48]
Round 8: 3sc, invdec, (6sc, invdec)*5, 3sc [42]
Round 9: 13sc, 2invdec, 5sc, 2invdec, 5sc, 2invdec, 7sc [36]
Round 10: 18sc, 6invdec, 6sc [30]
Rounds 11-13: 30sc [30] (3 rounds)
Change to body purple:
Rounds 14-16: 30sc [30] (3 rounds)
Round 17: 8slst, 22sc [30]
Round 18: 17sc, 5hdc, 8sc [30]
Round 19: 17sc, 3invdec, 7sc [27]
FO, leave a long tail for sewing.
Shoulder Pads (Make 2)
Use dark purple yarn:
Row 1: 6sc in MR, ch1, turn [6]
Row 2: 2sc, inc, 3sc, ch1, turn [7]
Row 3: inc, 2sc, 3sc in one loop, 2sc, inc, ch1, turn [11]
Row 4: inc, 4sc, 3sc in one loop, 4sc, inc, ch1, turn [15]
Row 5: inc, 6sc, 3sc in one loop, 6sc, inc, ch1, turn [19]
Row 6: inc, 8sc, 3hdc in one loop, 8sc, inc [23]
Without turning, crochet the straight, uneven part, then slst in the far corner and fasten off. There would be 10-12sc on the straight part.
Bracelets (Make 2)
Use black yarn:
Row 1: ch4, turn [3]
Rows 2-37: 3sc, turn [3] (37 rounds)
FO, leave a long tail for sewing.
Spikes on Bracelets (Make 6)
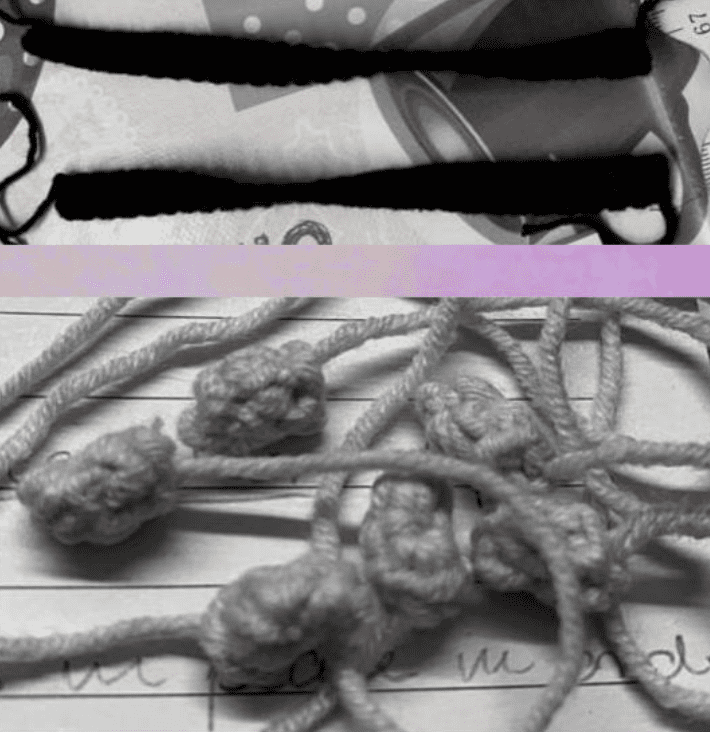
Use gray yarn:
Round 1: 3sc in MR [3]
Round 2: inc, sc, inc [5]
FO, leave a tail for sewing.
Star-Shaped Glasses
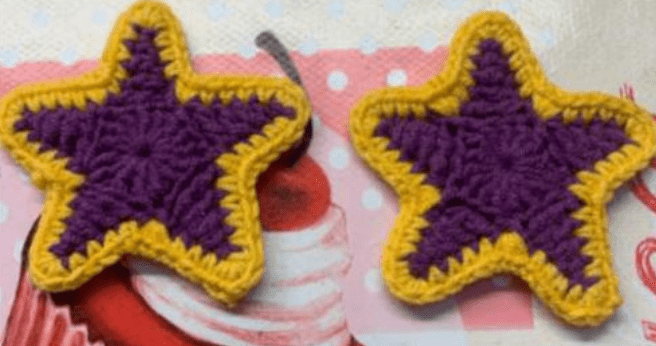
This might seem tricky because it’s fully wired, but it’s actually straightforward. Follow the pictures for visual guidance.
Stars (Make 2)
Use black yarn:
Round 1: 3ch in a MR, then 14dc in the same MR, join with a slst [15]. (This creates a larger-than-normal magic ring. Pull the ring tight.)
Round 2: ch6, start in the 3rd stitch from the hook, sc, hdc, dc, tc, skip 2 stitches on the base circle, and slst in the third. This creates the first point of the star.
Round 3: Repeat step 2 four more times to complete the five-pointed star.
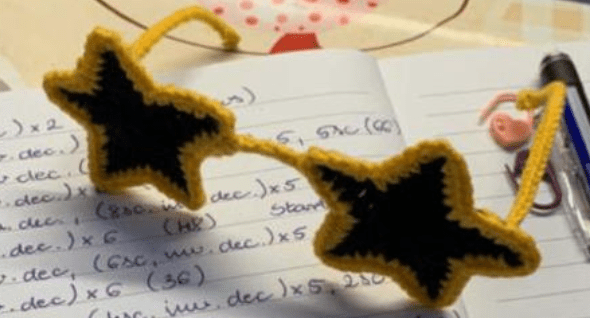
To make the stars into glasses:
- Form a frame from thin wire. You can make the pieces individually or as one piece.
- Crochet the star and wire together with yellow yarn, doing single crochets but making 2-3 sc in every corner of the star to prevent folding.
- Ensure you’re crocheting through the star and over the wire.
- Attach the crocheted star frames to the stem by sewing or gluing, or both.
Assembly Instructions
Step 1: Apply Felt Pieces
Glue the felt pieces in place in this order (UHU extra gel glue recommended):
- Star patch between the eyes
- Eye whites
- Little stars (optional)
- Iris (magenta)
- Eyelids (black glitter foam)
- Pupils (black)
- Star patch on face
- Star patches on body
- Star patch on belt
- Tooth
- Ear patches on the ears
- Eyebrows (optional)
You can paint the peeking edges of the eye with black acrylic paint if desired.
Step 2: Assemble Body Parts
- Sew the toe nails on the feet, embroider the nails on the fingers too.
- Sew the ears on the head, positioning the inner part to touch round 4 and the outer part to touch round 13.
- Sew on the legs between rounds 59 and 69, with 9-10 stitches between them.
- Sew on the arms between rounds 45 and 55.
- Sew the spikes on the bracelet, with 3 rows between each spike. Place the bracelet on the arm’s color-changing line and sew it together at the back.
- Sew or glue the shoulder pads where the arms meet the body.
- Glue the suspenders on the body with the upper part touching the shoulders and the lower parts touching the belt.
- Glue or sew the bow-tie right under the chin, in the middle of the chest.
Final Touches
- Add white dots in the eyes for highlights.
- Paint the zebra-like pattern on the pants with black acrylic paint.
- Create piercings from gold aluminum wire by bending small pieces with pliers. Push the ends into the desired locations and pinch them together to secure.
Congratulations! Your Glamrock Bonnie amigurumi is now complete!
Original pattern by Kamfor, inspired by Five Nights at Freddy’s: Security Breach. The Glamrock animatronics design and characters belong to Scott Cawthon and Steel Wool Studios, all rights reserved. This Glamrock Bonnie design was inspired by a fan design created by Snartles on Twitter.
