

Table of Contents
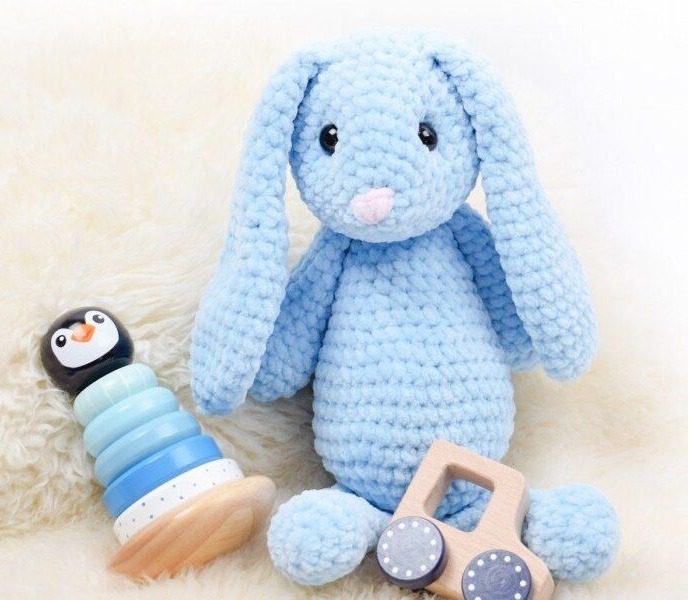
Creating Amigurumi Bunny a soft, huggable amigurumi bunny is a rewarding project for crocheters of all skill levels. This comprehensive guide provides detailed instructions to craft an adorable rabbit companion that stands approximately 36 cm tall. With its floppy ears and chubby limbs, this bunny makes a perfect gift for children, a charming addition to your home decor, or a treasured handmade keepsake.
Essential Materials for Your Amigurumi Bunny
Before beginning your crochet journey, gather these supplies:
- Hobbii Snuggle Solid yarn (or similar chunky yarn):
- Approximately 130g of main color (color no. 05)
- Small amount of contrasting color (color no. 03) for the nose
- Crochet hook size 6 mm
- Safety eyes (16 mm)
- Polyester fiberfill stuffing
- Yarn needle for assembly
- Scissors
This bunny pattern uses relatively thick yarn and a larger hook compared to many amigurumi projects, resulting in a generously sized stuffed toy that works up quickly.
Understanding Amigurumi Bunny Terminology
This pattern uses standard crochet terms:
- Magic ring (mr): A technique to begin crocheting in the round with no hole in the center
- Stitch (st): A single crochet unit
- Single crochet (sc): The basic stitch used throughout this pattern
- Together (tog): Combining stitches, usually for decreasing
Creating Your Amigurumi Bunny Expressive Head
Begin with the head, which features the bunny’s charming face:
Round 1: Make a magic ring and work 6 single crochets into it (6 stitches) Round 2: Work 2 single crochets in each stitch around (12 stitches) Round 3: Single crochet in each stitch around (12 stitches) Round 4: Work 1 single crochet, then 2 single crochets in the next stitch. Repeat this pattern around (18 stitches) Round 5: Work 2 single crochets, then 2 single crochets in the next stitch. Repeat this pattern around (24 stitches) Round 6: Work 3 single crochets, then 2 single crochets in the next stitch. Repeat this pattern around (30 stitches) Round 7: Work 4 single crochets, then 2 single crochets in the next stitch. Repeat this pattern around (36 stitches) Rounds 8-9: Single crochet in each stitch around for two rounds (36 stitches) Round 10: Work 5 single crochets, then 2 single crochets in the next stitch. Repeat this pattern around (42 stitches) Rounds 11-12: Single crochet in each stitch around for two rounds (42 stitches)
At this point, attach the 16 mm safety eyes between rounds 7 and 8, with 7-8 stitches between them.
Round 13: Work 5 single crochets, then 2 single crochets together. Repeat this pattern around (36 stitches) Round 14: Work 4 single crochets, then 2 single crochets together. Repeat this pattern around (30 stitches)
Begin stuffing the head firmly with fiberfill, ensuring it maintains its round shape.
Round 15: Work 3 single crochets, then 2 single crochets together. Repeat this pattern around (24 stitches) Round 16: Work 2 single crochets, then 2 single crochets together. Repeat this pattern around (18 stitches) Round 17: Work 1 single crochet, then 2 single crochets together. Repeat this pattern around (12 stitches) Round 18: Work 2 single crochets together around (6 stitches)
Sew the opening closed and weave in the yarn end securely.
Amigurumi Bunny Setting the Eyes for Personality
To give your bunny an expressive look, follow these steps for setting the eyes:
- Thread a needle with yarn and pull it up through the head, exiting at the outer edge of one eye
- Push the needle through to the other side of the same eye, then through the head toward the second eye
- Pull the yarn through on one side of the second eye
- Push the needle through the other side of this eye and down through the head
- Pull both yarn ends firmly until the eyes are positioned as desired, then secure the yarn
- Using a small amount of the contrasting color (no. 03), embroider a simple nose below the eyes
These details create the bunny’s endearing facial expression and bring your creation to life.
Amigurumi Bunny Crafting the Distinctive Bunny Ears
Make two identical ears:
Round 1: Make a magic ring and work 6 single crochets into it (6 stitches) Round 2: Work 2 single crochets in each stitch around (12 stitches) Round 3: Work 1 single crochet, then 2 single crochets in the next stitch. Repeat this pattern around (18 stitches) Round 4: Work 2 single crochets, then 2 single crochets in the next stitch. Repeat this pattern around (24 stitches) Rounds 5-9: Single crochet in each stitch around for five rounds (24 stitches) Round 10: Work 6 single crochets, then 2 single crochets together. Repeat this pattern around (21 stitches) Round 11: Single crochet in each stitch around (21 stitches) Round 12: Work 5 single crochets, then 2 single crochets together. Repeat this pattern around (18 stitches) Round 13: Single crochet in each stitch around (18 stitches) Round 14: Work 4 single crochets, then 2 single crochets together. Repeat this pattern around (15 stitches) Rounds 15-17: Single crochet in each stitch around for three rounds (15 stitches) Round 18: Work 3 single crochets, then 2 single crochets together. Repeat this pattern around (12 stitches) Rounds 19-21: Single crochet in each stitch around for three rounds (12 stitches) Round 22: Work 2 single crochets, then 2 single crochets together. Repeat this pattern around (9 stitches) Rounds 23-25: Single crochet in each stitch around for three rounds (9 stitches)
To complete each ear, fold it flat and join the opening with single crochet stitches. Leave a long tail of yarn for attaching to the head. Position the ears on top of the head and sew securely in place, allowing them to flop naturally for a realistic rabbit appearance.
Forming Amigurumi Bunny Body
Create the round, huggable body:
Round 1: Make a magic ring and work 6 single crochets into it (6 stitches) Round 2: Work 2 single crochets in each stitch around (12 stitches) Round 3: Work 1 single crochet, then 2 single crochets in the next stitch. Repeat this pattern around (18 stitches) Round 4: Work 2 single crochets, then 2 single crochets in the next stitch. Repeat this pattern around (24 stitches) Round 5: Work 3 single crochets, then 2 single crochets in the next stitch. Repeat this pattern around (30 stitches) Round 6: Work 4 single crochets, then 2 single crochets in the next stitch. Repeat this pattern around (36 stitches) Round 7: Work 5 single crochets, then 2 single crochets in the next stitch. Repeat this pattern around (42 stitches) Rounds 8-10: Single crochet in each stitch around for three rounds (42 stitches) Round 11: Work 5 single crochets, then 2 single crochets together. Repeat this pattern around (36 stitches) Round 12: Single crochet in each stitch around (36 stitches) Round 13: Work 4 single crochets, then 2 single crochets together. Repeat this pattern around (30 stitches) Round 14: Single crochet in each stitch around (30 stitches) Round 15: Work 3 single crochets, then 2 single crochets together. Repeat this pattern around (24 stitches) Rounds 16-17: Single crochet in each stitch around for two rounds (24 stitches)
Begin filling the body with stuffing at this point.
Round 18: Work 2 single crochets, then 2 single crochets together. Repeat this pattern around (18 stitches) Rounds 19-20: Single crochet in each stitch around for two rounds (18 stitches) Round 21: Work 1 single crochet, then 2 single crochets together. Repeat this pattern around (12 stitches) Round 22: Single crochet in each stitch around (12 stitches)
Complete the stuffing of the body, ensuring it’s firm but not overstuffed. Cut the yarn, leaving a long tail for attaching the head. Using the yarn tail, sew the head securely to the body, positioning it so the bunny can sit comfortably.
Creating the Arms
Make two identical arms:
Round 1: Make a magic ring and work 5 single crochets into it (5 stitches) Round 2: Work 2 single crochets in each stitch around (10 stitches) Round 3: Work 1 single crochet, then 2 single crochets in the next stitch. Repeat this pattern around (15 stitches) Round 4: Single crochet in each stitch around (15 stitches) Round 5: Work 1 single crochet, then 2 single crochets together. Repeat this pattern around (10 stitches) Rounds 6-15: Single crochet in each stitch around for ten rounds (10 stitches)
Fill the arms lightly with stuffing. Fold the opening flat and join with single crochet stitches. Leave a long tail of yarn for attaching to the body. Sew the arms to the upper sides of the body, positioning them so they appear to be reaching forward slightly.
Forming the Legs
Make two identical legs:
Round 1: Make a magic ring and work 6 single crochets into it (6 stitches) Round 2: Work 2 single crochets in each stitch around (12 stitches) Round 3: Work 1 single crochet, then 2 single crochets in the next stitch. Repeat this pattern around (18 stitches) Round 4: Single crochet in each stitch around (18 stitches) Round 5: Work 1 single crochet, then 2 single crochets together. Repeat this pattern around (12 stitches) Rounds 6-14: Single crochet in each stitch around for nine rounds (12 stitches)
Fill the legs lightly with stuffing. Fold the opening flat and join with single crochet stitches. Leave a long tail of yarn for attaching to the body. Sew the legs to the bottom of the body, positioning them so the bunny can sit stably.
Adding Final Touches
Once all components are attached, take time to check that:
- The head is firmly attached and properly positioned on the body
- The ears are securely sewn and positioned symmetrically
- Arms and legs are attached at appropriate angles for a natural sitting position
- All visible yarn ends are neatly woven in
- Stuffing is evenly distributed throughout the bunny
For extra personality, consider adding optional details like:
- A small pom-pom tail at the back
- A tiny bow tie or ribbon around the neck
- Embroidered whiskers around the nose
- A simple embroidered mouth below the nose
Caring for Your Amigurumi Bunny
To keep your handcrafted bunny looking its best:
- Spot clean with a damp cloth and mild soap as needed
- Air dry completely if cleaning is necessary
- Keep away from direct sunlight to prevent color fading
- Display safely out of reach of very young children and pets
Why This Bunny Pattern Is Perfect for All Skill Levels
This amigurumi bunny pattern offers several advantages for crocheters:
- The chunky yarn and larger hook make it work up quickly
- The simple single crochet stitches are accessible for beginners
- The finished size (36 cm) creates an impressive, huggable result
- The classic bunny design appeals to all ages
- The pattern’s straightforward construction builds confidence in assembly techniques
Creative Variations to Try
While the basic pattern creates a charming bunny, consider these variations:
- Color Changes: Try a traditional gray bunny, a pure white one, or even a colorful rainbow rabbit
- Textured Yarn: Experiment with fuzzy or velvet yarn for a different tactile experience
- Size Adjustments: Use finer yarn and a smaller hook for a petite version
- Clothing: Crochet a simple dress, sweater, or scarf for your bunny
- Seasonal Themes: Add festive accessories for holidays like Easter, Christmas, or Halloween
Perfect Occasions for Gifting Your Amigurumi Bunny
This handcrafted bunny makes an excellent gift for many occasions:
- Baby showers and nursery decor
- Easter celebrations
- Birthday presents for children
- Spring-themed home decoration
- “Just because” gifts for bunny enthusiasts
- Comfort companions for anyone needing a soft friend
Check this out :Crochet a Festive Christmas Goose Amigurumi
Conclusion
Creating an amigurumi bunny combines the joy of crochet with the satisfaction of crafting a huggable companion. By following this detailed pattern, you’ve made not just a stuffed toy, but a character with personality and charm. The techniques learned in this project—from shaping the distinctive ears to assembling the components for a balanced sitting position—build valuable skills for future amigurumi projects.
Remember that each handmade bunny carries the unique touch of its creator. Small variations in tension, stuffing, or positioning give your bunny its own special character. Whether kept for yourself or given as a heartfelt gift, your crocheted creation represents the time, care, and creativity that only handcrafted items possess.
Enjoy your adorable amigurumi bunny, and consider making companion animals to create an entire handmade menagerie!
