

Table of Contents
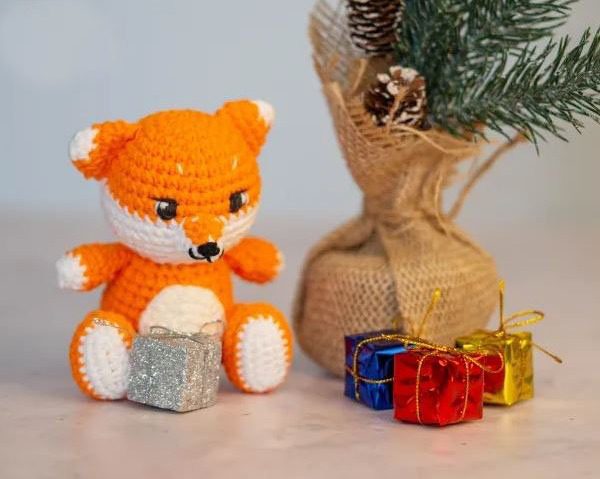
Creating a handcrafted fox amigurumi brings the charm of this woodland creature into your home or makes a perfect heartfelt gift. This detailed pattern guides you through crafting an adorable fox plushie with distinctive orange and white coloring. Whether you’re new to amigurumi or an experienced crocheter looking to expand your collection, this fox pattern combines simple techniques with character-building details for a rewarding project.
Essential Materials for Your Fox Amigurumi
To begin crafting your fox, gather these supplies:
- YarnArt Jeans in Orange for the main body
- YarnArt Jeans in White (color 01) for contrasting details
- 2mm crochet hook for fine detail work
- 7mm safety eyes (secure and professional-looking)
- Polyester fiberfill for stuffing
- Basic tools: scissors, yarn needle, stitch markers, pins
Understanding Crochet Terminology
Familiarize yourself with these crochet terms used throughout the pattern:
- Chain: The foundation of crochet work
- Stitch/Stitches: The basic unit of crochet fabric
- Slip stitch: Used for joining or creating a flat seam
- Single crochet: The most common stitch used in amigurumi
- Increase: Adding stitches by working multiple stitches into one
- Decrease: Reducing stitches by working multiple stitches together
- Double crochet: A taller stitch providing texture
- Half double crochet: A medium-height stitch
- Front loop only: Working through only the front loop of a stitch
- Back loop only: Working through only the back loop of a stitch
- Fasten off: Securing and ending your work
- Magic ring: A technique for starting crochet in the round
Creating Your Fox Head
The head forms the characterful focal point of your amigurumi:
Round 1: Begin with orange yarn and create 6 single crochets in a magic ring (6 stitches total) Round 2: Increase in each stitch around (12 stitches total) Round 3: Work a pattern of 1 single crochet, 1 increase, repeated 6 times (18 stitches total) Round 4: Work a pattern of 2 single crochets, 1 increase, repeated 6 times (24 stitches total) Round 5: Work a pattern of 3 single crochets, 1 increase, repeated 6 times (30 stitches total) Round 6: Work 30 single crochets around (30 stitches total) Round 7: Work a pattern of 4 single crochets, 1 increase, repeated 6 times (36 stitches total) Round 8: Work 36 single crochets around (36 stitches total) Round 9: Work 36 single crochets around (36 stitches total) Round 10: Begin color work with orange for 7 single crochets, switch to white and work 3 single crochets in the same stitch, 3 single crochets in the same stitch, 18 single crochets, 3 single crochets in the same stitch, 3 single crochets in the same stitch, finish with orange for 7 single crochets (44 stitches total) Round 11: Continue with orange for 7 single crochets, white for 30 single crochets, and orange for 7 single crochets (44 stitches total) Round 12: Work orange for 7 single crochets, white for 3 single crochets, 1 decrease, 20 single crochets, 1 decrease, 3 single crochets, and orange for 7 single crochets (42 stitches total) Round 13: Work a pattern with orange yarn (5 single crochets, 1 decrease), white yarn (5 single crochets, 1 decrease) repeated 4 times, and orange yarn (5 single crochets, 1 decrease) (36 stitches total) Round 14: Work a pattern with orange yarn (4 single crochets, 1 decrease), white yarn (4 single crochets, 1 decrease) repeated 4 times, and orange yarn (4 single crochets, 1 decrease) (30 stitches total) Round 15: Work a pattern with orange yarn (3 single crochets, 1 decrease), white yarn (3 single crochets, 1 decrease) repeated 4 times, and orange yarn (3 single crochets, 1 decrease) (24 stitches total) Round 16: Work a pattern with orange yarn (2 single crochets, 1 decrease), white yarn (2 single crochets, 1 decrease) repeated 4 times, and orange yarn (2 single crochets, 1 decrease) (18 stitches total)
Fasten off, leaving enough yarn for sewing parts together later. Stuff the head firmly with fiberfill. Place the safety eyes between rounds 9 and 10, approximately 6 stitches apart.
Crafting the Fox Ears
The pointed ears give your fox its characteristic alert appearance:
Make two identical ears:
Round 1: Begin with white yarn and create 6 single crochets in a magic ring (6 stitches total) Round 2: Work 6 single crochets around (6 stitches total)
Switch to orange yarn:
Round 3: Work a pattern of 1 single crochet, 1 increase, repeated 3 times (9 stitches total) Round 4: Work a pattern of 2 single crochets, 1 increase, repeated 3 times (12 stitches total) Round 5: Work a pattern of 3 single crochets, 1 increase, repeated 3 times (15 stitches total)
Fasten off and attach each ear to the head.
Adding the Distinctive Nose
The nose creates the focal point of your fox’s face:
Round 1: Using white yarn, create 6 single crochets in a magic ring (6 stitches total) Round 2: Work white yarn for 1 single crochet, 1 increase, switch to orange yarn for 1 single crochet, 1 increase, then white yarn for 1 single crochet, 1 increase (9 stitches total) Rounds 3-4: Maintain white yarn for 3 single crochets, orange yarn for 3 single crochets, and white yarn for 3 single crochets (9 stitches total)
Fasten off. Sew the nose to the center front of the head. Use black yarn to embroider nostrils and other facial details.
Forming the Fox Body
The body creates the core structure for your amigurumi:
Round 1: With orange yarn, create 6 single crochets in a magic ring (6 stitches total) Round 2: Increase in each stitch around (12 stitches total) Round 3: Work a pattern of 1 single crochet, 1 increase, repeated 6 times (18 stitches total) Round 4: Work a pattern of 2 single crochets, 1 increase, repeated 6 times (24 stitches total) Round 5: Work a pattern of 3 single crochets, 1 increase, repeated 6 times (30 stitches total) Round 6: Work a pattern of 4 single crochets, 1 increase, repeated 6 times (36 stitches total) Rounds 7-9: Work 36 single crochets around for three rounds (36 stitches total) Round 10: Work a pattern of 2 single crochets, 1 decrease, 2 single crochets, repeated 6 times (30 stitches total) Round 11: Work 30 single crochets around (30 stitches total) Round 12: Work a pattern of 4 single crochets, 1 decrease, 4 single crochets, repeated 3 times (27 stitches total) Round 13: Work 27 single crochets around (27 stitches total) Round 14: Work a pattern of 7 single crochets, 1 decrease, repeated 3 times (24 stitches total) Round 15: Work 24 single crochets around (24 stitches total) Round 16: Work a pattern of 1 single crochet, 1 decrease, 1 single crochet, repeated 6 times (18 stitches total)
Fasten off. Stuff the body firmly with fiberfill, then sew it to the head.
Creating the White Belly
The white belly adds a distinctive contrast to your fox:
Round 1: Using white yarn, create 6 single crochets in a magic ring (6 stitches total) Round 2: Increase in each stitch around (12 stitches total) Round 3: Work a pattern of 1 single crochet, 1 increase, repeated 6 times (18 stitches total) Round 4: Work a pattern of 2 single crochets, 1 increase, repeated 6 times (24 stitches total)
Fasten off. Sew the white belly to the front of the body.
Adding the Arms
The arms allow your fox to sit upright or be posed:
Make two identical arms:
Round 1: Begin with white yarn and create 6 single crochets in a magic ring (6 stitches total) Round 2: Work a pattern of 1 single crochet, 1 increase, repeated 3 times (9 stitches total)
Switch to orange yarn:
Rounds 3-9: Work 9 single crochets around for seven rounds (9 stitches total)
Fasten off. Stuff each arm lightly with fiberfill, then sew them to the sides of the body.
Forming the Legs
The legs give your fox stability and character:
Make two identical legs:
Chain 7 with white yarn Row 1: Work 1 increase, 4 single crochets, 3 single crochets in next stitch, 4 single crochets, 1 increase Row 2: Work 2 increases, 4 single crochets, 3 increases, 4 single crochets, 2 increases
Switch to orange yarn:
Rounds 3-6: Work 22 single crochets around for four rounds (22 stitches total) Round 7: Work 7 single crochets, 4 decreases, 7 single crochets (18 stitches total) Round 8: Work 5 single crochets, 4 decreases, 5 single crochets (14 stitches total) Round 9: Work 5 single crochets, 2 decreases, 5 single crochets (12 stitches total) Rounds 10-14: Work 12 single crochets around for five rounds (12 stitches total)
Fasten off. Stuff each leg with fiberfill, then sew them to the bottom of the body.
Creating the Bushy Tail
The tail completes your fox’s iconic silhouette:
Round 1: Using white yarn, create 6 single crochets in a magic ring (6 stitches total) Round 2: Work 6 single crochets around (6 stitches total) Round 3: Work a pattern of 1 single crochet, 1 increase, repeated 3 times (9 stitches total) Round 4: Work 9 single crochets around (9 stitches total)
Switch to orange yarn:
Round 5: Work a pattern of 2 single crochets, 1 increase, repeated 3 times (12 stitches total) Round 6: Work 12 single crochets around (12 stitches total) Round 7: Work a pattern of 3 single crochets, 1 increase, repeated 3 times (15 stitches total) Rounds 8-9: Work 15 single crochets around for two rounds (15 stitches total) Round 10: Work a pattern of 3 single crochets, 1 decrease, repeated 3 times (12 stitches total) Round 11: Work a pattern of 1 single crochet, 1 decrease, 1 single crochet, repeated 3 times (9 stitches total) Round 12: Work a pattern of 1 single crochet, 1 decrease, repeated 3 times (6 stitches total)
Fasten off. Stuff the tail firmly to create a fluffy appearance, then sew it to the back of the body.
Assembly and Finishing Touches
Now that you’ve created all the individual components, it’s time to bring your fox to life:
- Ensure all parts are stuffed appropriately before final seaming
- Attach the head to the body with secure stitches
- Position and sew the ears to the top of the head
- Attach the nose to the center front of the face
- Sew the arms to the upper sides of the body
- Attach the legs to the bottom of the body
- Secure the tail to the back of the body
- Add any final embroidery details like whiskers or additional facial features
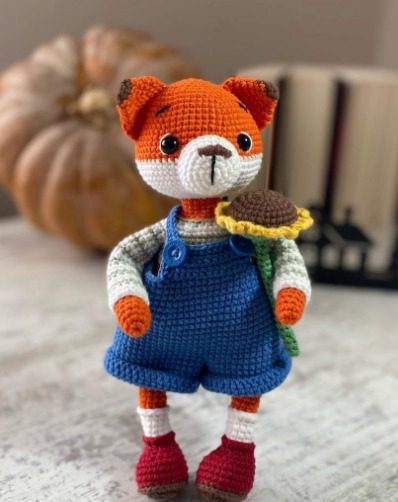
Customization Ideas for Your Fox
While following the pattern creates an authentic fox, consider these variations:
- Use different shades of orange and cream for regional fox variations
- Add accessories like a tiny scarf or flower crown
- Create a sleeping fox by embroidering closed eyes
- Make a family of foxes in different sizes by adjusting your hook size
- Add wire to the legs and tail for posable features
The Appeal of Fox Amigurumi
Foxes have captivated our imagination throughout history with their clever nature and striking appearance. Their distinctive coloration—the vibrant orange-red fur contrasted with white underparts and black legs—makes them instantly recognizable even in stylized amigurumi form.
Creating a fox amigurumi connects you to this beloved woodland creature while developing your crochet skills. Each stitch contributes to bringing this character to life, from the pointed ears to the bushy tail. The color changes and shaping techniques used in this pattern provide valuable experience that transfers to other amigurumi projects.
Caring for Your Handmade Creation
To keep your fox amigurumi looking its best:
- Spot clean with mild soap and water as needed
- Allow to air dry completely away from direct heat sources
- Display away from direct sunlight to prevent color fading
- Gently reshape if necessary
- For gifting, consider placing in a small gift box with tissue paper
Check this out :Crochet Monkey Keychain Pattern
The Joy of Amigurumi Crafting
Completing your fox amigurumi brings the satisfaction that comes from creating something with your own hands. In today’s digital world, there’s something genuinely fulfilling about crafting a tangible object stitch by stitch. The meditative quality of crochet work provides stress relief while yielding a charming result.
Whether you’re making this fox for yourself, as a special gift, or to practice new techniques, the process is as rewarding as the finished creation. Your completed fox represents hours of focused creativity and carries the unique imprint of its maker—something no mass-produced item can match.
As you admire your finished fox, remember that each amigurumi project builds your skills for the next. The techniques used in this pattern—from color changes to three-dimensional shaping—provide valuable experience for future creations. Your fox is not just a cute decoration but a milestone in your crafting journey.
Happy crocheting!
