

Table of Contents
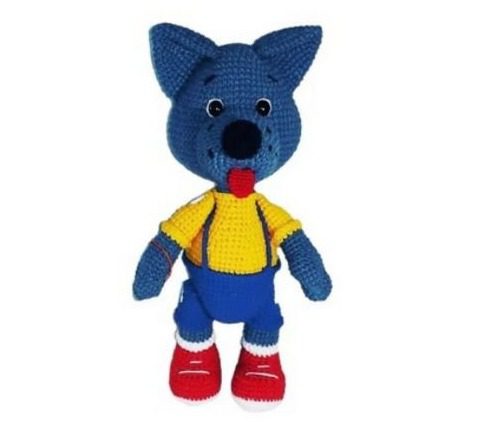
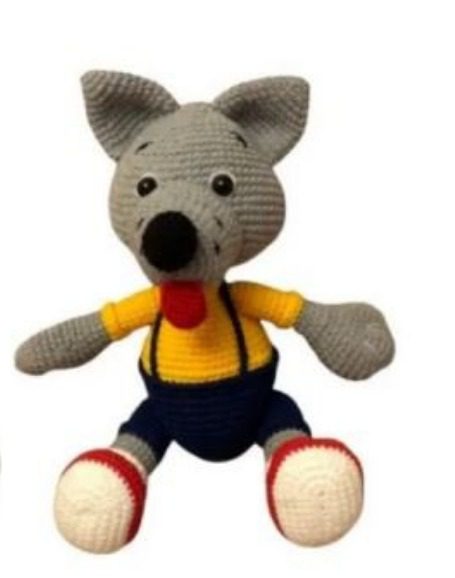
Create Amigurumi Dog an irresistibly cute amigurumi dog with this comprehensive pattern guide. Perfect for intermediate crocheters, this detailed tutorial walks you through every step of crafting a sweet canine friend with expressive features and charming clothes. Follow along to create a unique handmade companion that’s sure to delight both children and collectors alike.
Introduction to Amigurumi Dog Crochet
Amigurumi—the Japanese art of crocheting small stuffed toys—has captured the hearts of crafters worldwide. This dog pattern showcases classic amigurumi techniques while adding charming details like a removable outfit and expressive facial features. Whether you’re making this adorable pup as a gift or for your own collection, this pattern provides all the guidance you need to create a polished, professional-looking finished piece.
Materials Needed for Your Amigurumi Dog
Before beginning your project, gather these essential materials:
- Yarn Art Jeans or similar medium weight yarn in:
- Gray (for head, ears, arms, and tail)
- Blue (for body/pants)
- Yellow (for shirt)
- Red (for accents)
- White (for feet/boots)
- Black (for nose)
- Vita Cotton Coco in red (for tongue) or similar weight red yarn
- 2.0mm crochet hook (size 2)
- Polyester fiberfill stuffing
- Safety eyes (10mm diameter) or black beads
- Small piece of white felt
- Fabric glue
- Four 8mm buttons (for attaching limbs)
- Yarn needle
- Scissors
- Stitch markers
Understanding Amigurumi Dog Terminology
Familiarize yourself with these standard abbreviations used throughout the pattern:
- SC – Single crochet: The fundamental stitch for amigurumi
- INC – Increase: Creating two stitches in one stitch
- DEC – Decrease: Combining two stitches into one
- CH – Chain: Creates a series of linked stitches
- HDC – Half double crochet: A stitch taller than single crochet
- SL-ST – Slip stitch: Used to join rounds or move position
- Magic ring: A technique to start crocheting in the round with no hole
- VP – Chain stitch: Alternative terminology for chain
- Front/back loop only: Working through just the front or back loop of the stitch
Creating Amigurumi Dog Head
The head forms the foundation of your amigurumi dog’s personality. Using gray yarn:
- Create a magic ring and work 6 single crochets into the ring (6)
- Increase in each stitch around (12)
- Work (3 increases, 3 single crochets) twice (18)
- Work (1 single crochet, increase) 3 times, 3 single crochets, (1 single crochet, increase) 3 times, 3 single crochets (24)
- Work (2 single crochets, increase) 3 times, 3 single crochets, (2 single crochets, increase) 3 times, 3 single crochets (30)
- Work (3 single crochets, increase) 3 times, 3 single crochets, (3 single crochets, increase) 3 times, 3 single crochets (36)
- Work (4 single crochets, increase) 3 times, 3 single crochets, (4 single crochets, increase) 3 times, 3 single crochets (42)
- Work (5 single crochets, increase) 3 times, 3 single crochets, (5 single crochets, increase) 3 times, 3 single crochets (48) 9-11. Work 3 rounds of 48 single crochets (48)
- Work (6 single crochets, increase) 3 times, 3 single crochets, (6 single crochets, increase) 3 times, 3 single crochets (54)
- Work 54 single crochets (54)
- Work (10 single crochets, increase, 2 single crochets, increase, 2 single crochets, increase, 10 single crochets) twice (60)
- Work 11 single crochets, increase, 3 single crochets, increase, 3 single crochets, increase, 21 single crochets, increase, 3 single crochets, increase, 3 single crochets, increase, 10 single crochets (66) 16-20. Work 5 rounds of 66 single crochets (66)
- Work 11 single crochets, decrease, 3 single crochets, decrease, 3 single crochets, decrease, 21 single crochets, decrease, 3 single crochets, decrease, 3 single crochets, decrease, 10 single crochets (60)
- Work (10 single crochets, decrease, 2 single crochets, decrease, 2 single crochets, decrease, 10 single crochets) twice (54)
- Work (6 single crochets, decrease) 3 times, 3 single crochets, (6 single crochets, decrease) 3 times, 3 single crochets (48)
- Work (6 single crochets, decrease) 6 times (42)
- Work (5 single crochets, decrease) 6 times (36)
- Work (4 single crochets, decrease) 6 times (30)
- Work (3 single crochets, decrease) 6 times (24)
- Work (2 single crochets, decrease) 6 times (18)
Make a slip stitch, fasten off, and leave a 15-20cm tail for sewing. Stuff the head firmly before closing.
Amigurumi Dog Crafting the Ears
Make two identical ears using gray yarn:
- Create a magic ring and work 4 single crochets into the ring (4)
- Work 2 increases in each stitch (8)
- Work (1 single crochet, increase) 4 times (12)
- Work (2 single crochets, increase) 4 times (16)
- Work (3 single crochets, increase) 4 times (20)
- Work (4 single crochets, increase) 4 times (24) 7-8. Work 2 rounds of 24 single crochets (24)
- Work (3 single crochets, increase) 6 times (30)
- Work 30 single crochets (30)
- Work (4 single crochets, increase) 6 times (36)
- Work 36 single crochets (36)
Fasten off, leaving a long tail for sewing. Fold each ear in half and sew to the head between rows 4 and 13.
Amigurumi Dog Creating the Muzzle
The muzzle gives your dog its distinctive facial structure. Using gray yarn:
- Create a magic ring and work 8 single crochets into the ring (8)
- Increase in each stitch around (16)
- Work (1 single crochet, increase) 8 times (24)
- Work (2 single crochets, increase) 8 times (32) 5-9. Work 5 rounds of 32 single crochets (32)
- Work (3 single crochets, increase) 8 times (40)
- Work (4 single crochets, increase) 8 times (48)
- Work 48 single crochets (48)
Fasten off, leaving a long tail for sewing. Stuff the muzzle firmly and sew it to the head between rows 13 and 24.
Amigurumi Dog Forming the Nose
The nose adds character to your amigurumi dog. Using black yarn:
- Create a magic ring and work 6 single crochets into the ring (6)
- Increase in each stitch around (12)
- Work (1 single crochet, increase) 6 times (18) 4-5. Work 2 rounds of 18 single crochets (18)
- Work (1 single crochet, decrease) 6 times (12)
Fasten off, leaving a long tail for sewing. Stuff the nose lightly and sew it to the muzzle between rows 2 and 5.
Amigurumi Dog Creating the Tongue
The tongue adds a playful touch to your dog. Using red yarn:
- Create a magic ring and work 6 single crochets into the ring (6)
- Increase in each stitch around (12) 3-7. Work 5 rounds of 12 single crochets (12)
Fold the tongue in half and join with 5 single crochets. Leave a tail for sewing. Attach the tongue to the muzzle, positioning it about 5 rows below the nose.
Crafting the Dog’s Body
The body incorporates color changes to create the appearance of clothing. Start with blue yarn:
- Create a magic ring and work 6 single crochets into the ring (6)
- Increase in each stitch around (12)
- Work (1 single crochet, increase) 6 times (18)
- Work 1 single crochet, increase, (2 single crochets, increase) 5 times, 1 single crochet (24)
- Work (3 single crochets, increase) 6 times (30)
- Work 2 single crochets, increase, (4 single crochets, increase) 5 times, 2 single crochets (36)
- Work (5 single crochets, increase) 6 times (42)
- Work 3 single crochets, increase, (6 single crochets, increase) 5 times, 3 single crochets (48)
- Work (7 single crochets, increase) 6 times (54) 10-16. Work 7 rounds of 54 single crochets (54)
Change to yellow yarn, but don’t cut the blue yarn—carry it along the inside: 17. Work 54 single crochets in the back loops only (54) 18. Work 54 single crochets (54) 19. Work (7 single crochets, decrease) 6 times (48) 20. Work 48 single crochets (48) 21. Work 3 single crochets, decrease, (6 single crochets, decrease) 5 times, 3 single crochets (42) 22. Work 42 single crochets (42) 23. Work (5 single crochets, decrease) 6 times (36) 24. Work 36 single crochets (36) 25. Work 2 single crochets, decrease, (4 single crochets, decrease) 5 times, 2 single crochets (30)
Begin stuffing the body: 26-27. Work 2 rounds of 30 single crochets (30) 28. Work (3 single crochets, decrease) 6 times (24) 29. Work 24 single crochets (24)
Change to gray yarn, but don’t cut the yellow yarn: 30. Work 1 single crochet, decrease, (2 single crochets, decrease) 5 times, 1 single crochet in the back loops only (18) 31. Work 18 single crochets (18)
Fasten off, cut the yarn and weave in the end. Stuff the body firmly.
Now, work with the blue yarn from row 17:
- Insert your hook into the front loops of row 17 and work 54 single crochets around
- Join with a slip stitch, fasten off, and weave in the end
Then, work with the yellow yarn from row 30:
- Insert your hook into the front loops of row 30 and work 18 single crochets around
- Join with a slip stitch, fasten off, and weave in the end
Creating the Legs
Make two identical legs. Begin with white yarn:
- Chain 8. Starting from the second chain from the hook, work 6 single crochets along the chain, 4 single crochets in the last chain, then continue on the opposite side of the chain with 5 single crochets, increase once (17)
- Work increase, 5 single crochets, 4 increases, 5 single crochets, 2 increases (24)
- Work 1 single crochet, increase, 5 single crochets, (1 single crochet, increase) 4 times, 5 single crochets, (1 single crochet, increase) twice (31)
- Work 2 single crochets, increase, 5 single crochets, (2 single crochets, increase) 4 times, 5 single crochets, (2 single crochets, increase) twice (38)
- Work 3 single crochets, increase, 5 single crochets, (3 single crochets, increase) 4 times, 5 single crochets, (3 single crochets, increase) twice (45)
- Work 45 single crochets in the back loops only (45) 7-9. Work 3 rounds of 45 single crochets (45)
- Work 9 half double crochets, 10 decreases, 16 half double crochets (35)
- Work 35 single crochets (35)
- Work 7 single crochets, 7 decreases, 9 single crochets, decrease, 2 single crochets (27)
- Work 27 single crochets (27)
- Work 6 single crochets, 5 decreases, 11 single crochets (22)
- Work 20 single crochets (work an incomplete round)
- Work 20 single crochets, decrease (21)
- Work 9 single crochets, decrease, 10 single crochets (20)
Stuff the boot portion firmly. Change to gray yarn: 18. Work 20 single crochets in the back loops only 19-21. Work 3 rounds of 20 single crochets
Change to blue yarn: 22. Work 20 single crochets in the back loops only 23-26. Work 4 rounds of 20 single crochets (20) 27. Work (4 single crochets, decrease, 4 single crochets) twice (18) 28. Work 18 single crochets (18)
Stuff the leg firmly: 29. Work (1 single crochet, decrease) 6 times (12) 30. Work 6 decreases (6)
Close the opening by pulling the yarn through the remaining stitches.
For the boot cuff:
- Attach white yarn to the back loops of row 18
- Work 2 rounds of 20 single crochets
- Fold down to create the cuff
For the pants cuff:
- Attach blue yarn to the back loops of row 22
- Work 2 rounds of 20 single crochets
- Fold up to create the cuff
Creating the Arms
Make two identical arms using gray yarn:
- Create a magic ring and work 6 single crochets into the ring (6)
- Increase in each stitch around (12)
- Work (3 increases, 3 single crochets) twice (18)
- Work (1 single crochet, increase) 3 times, 3 single crochets, (1 single crochet, increase) 3 times, 3 single crochets (24)
- Work (2 single crochets, increase) 3 times, 3 single crochets, (2 single crochets, increase) 3 times, 3 single crochets (30) 6-9. Work 4 rounds of 30 single crochets (30)
- Work (2 single crochets, decrease) 3 times, 3 single crochets, (2 single crochets, decrease) 3 times, 3 single crochets (24)
- Work 24 single crochets (24)
- Work (1 single crochet, decrease) 3 times, 3 single crochets, (1 single crochet, decrease) 3 times, 3 single crochets (18) 13-14. Work 2 rounds of 18 single crochets (18)
- Work (4 single crochets, decrease) 3 times (15) 16-17. Work 2 rounds of 15 single crochets (15)
Change to yellow yarn: 18. Work 15 single crochets in the back loops only 19-25. Work 7 rounds of 15 single crochets (15) 26. Work (3 single crochets, decrease) 3 times (12) 27. Work 12 single crochets (12) 28. Work 6 decreases (6)
For the sleeve cuff:
- Attach yellow yarn to the back loops of row 18
- Work 2 rounds of 15 single crochets
- Fold down to create the cuff
For the fingers:
- Create two small pinches at row 8 level to suggest fingers
Creating the Tail
The tail adds a final touch of character. Using gray yarn:
- Create a magic ring and work 6 single crochets into the ring (6)
- Work (1 single crochet, increase) 3 times (9) 3-7. Work 5 rounds of 9 single crochets (9)
- Work (2 single crochets, increase) 3 times (12) 9-14. Work 6 rounds of 12 single crochets (12)
- Work (3 single crochets, increase) 3 times (15)
- Work 15 single crochets (15)
Stuff the tail and sew it to the back of the pants between rows 9 and 13.
Assembly Instructions
Now that you’ve created all components, it’s time to assemble your amigurumi dog:
- Head and Facial Features:
- If using safety eyes, insert them between rows 12 and 13 on either side of the muzzle
- Alternatively, sew on bead eyes or create eyes with black yarn
- Embroider eyebrows above the eyes using black yarn
- Ensure the muzzle, nose, and tongue are securely attached
- Ears and Head:
- Position the ears on either side of the head, between rows 4 and 13
- Fold each ear in half before attaching for a three-dimensional look
- Sew securely through multiple points
- Body:
- Attach the head to the body at the neck opening
- Ensure the head is positioned with the face forward
- Limbs:
- For a more poseable dog, attach arms and legs using button joints:
- Sew a button to the inside of the body where each limb will attach
- Thread a strong piece of yarn through the top of the limb
- Pass the yarn through the body and through the button
- Tie securely on the inside
- Alternatively, sew limbs directly to the body for a fixed position
- For a more poseable dog, attach arms and legs using button joints:
- Final Details:
- Add suspenders to the pants using thin strips of yellow yarn
- Embroider shoe laces on the white boots
- Add any personal touches or details you’d like
Understanding Round Progression and Special Techniques
Head Shaping Technique
The head of this dog uses a specialized round progression that creates an elongated shape rather than a perfect sphere:
- Initial expansion (rounds 1-8): Creates the back of the head with standard increases
- Straight section (rounds 9-11): Maintains width to create length
- Strategic expansion (rounds 12-15): Adds selective increases to widen specific areas for the cheeks and face
- Stabilizing (rounds 16-20): Maintains the expanded shape to create the face area
- Controlled decreases (rounds 21-28): Gradually reduces stitches to form the snout
This technique creates the distinctive dog head shape with a longer snout area.
Working with Back Loops Only
This pattern frequently uses the “back loops only” technique to create visible ridges that serve as:
- Folding lines: For cuffs on sleeves and pant legs (rows 18 and 22 of legs, row 18 of arms)
- Color transition points: Where the shirt meets the pants (row 17 of body)
- Texture details: To add dimension and visual interest
When you see “work in back loops only,” insert your hook only through the back loop of each stitch in that round. This leaves the front loops exposed, which:
- Creates a visible horizontal ridge around your work
- Provides loops for attaching additional elements or working decorative stitches
- Creates natural fold lines for cuffs and clothing details
Button Joint Technique
For moveable limbs, this pattern uses button joints:
- Sew a button securely to the inside of the body at each attachment point
- Thread a strong piece of yarn or thread through the top of the limb
- Pass the yarn through the body wall and through the button
- Pull to desired tension (tight enough for stability but loose enough for movement)
- Tie securely on the inside of the body
- This creates a pivot point that allows the limbs to move
Customization Ideas
Make your amigurumi dog uniquely yours with these creative variations:
- Color Choices: Change the clothing colors to create different outfits
- Facial Expressions: Modify eye placement and embroidered details for different expressions
- Accessories: Add a small backpack, hat, or collar
- Size Variations: Adjust yarn weight and hook size for different sized dogs
- Breed Specific: Modify ear shape or add spots to suggest different dog breeds
- Seasonal Versions: Create holiday-themed outfits (Christmas sweater, Halloween costume)
Troubleshooting Common Issues
If you encounter problems during your project:
- Gaps in Stitches: Check your tension and adjust as needed; amigurumi typically requires tight stitches
- Misshapen Parts: Count stitches in each round and use stitch markers to track the beginning
- Uneven Stuffing: Add stuffing gradually and use a pencil or chopstick to reach tight spots
- Wobbly Limbs: Ensure button joints are secure or reinforce sewn connections
- Difficulty with Color Changes: Practice carrying the unused yarn inside the piece for cleaner transitions
Mastering the Back Loop Technique
Working in back loops only is crucial for this pattern. Here’s a detailed guide:
- Identifying Loops: Each stitch has two loops at the top—the front loop (closer to you) and the back loop (further from you)
- For Back Loop Only: Insert your hook under ONLY the back loop of each stitch
- Creating a Ridge: This technique creates a visible horizontal ridge on the outside of your work
- Creating Cuffs:
- Work a round in back loops only
- Work 1-2 rounds normally
- Fold at the ridge line and sew if needed to secure
This technique is used extensively for clothing details in this pattern:
- Row 17 of body: Creates shirt/pants separation
- Row 18 of legs: Creates boot cuffs
- Row 22 of legs: Creates pant cuffs
- Row 18 of arms: Creates sleeve cuffs
Check this out :Crocheting an Adorable Amigurumi Caterpillar Pattern
Conclusion
Creating this amigurumi dog combines several crochet techniques into one delightful project. The pattern introduces clothing details, expressive features, and optional moveable joints that elevate your amigurumi skills. Your finished dog, with its charming outfit and personality, makes a perfect gift or a wonderful addition to your handmade collection.
The skills developed in this project—including specialized increasing patterns, back loop only stitching, color changes, and joining techniques—build a strong foundation for tackling more complex amigurumi designs. Each dog you create will have its own personality based on your tension, color choices, and the small variations that make handmade items so special.
Remember that amigurumi is both a craft and an art form—feel free to experiment with colors, proportions, and details to make each creation uniquely yours. Your handcrafted dog represents not just a toy but a labor of love and creativity that will bring joy to everyone who sees it.
If you share photos of your finished amigurumi dog on social media, consider tagging the original pattern creator to show appreciation for their design. Happy crocheting!
