


Table of Contents
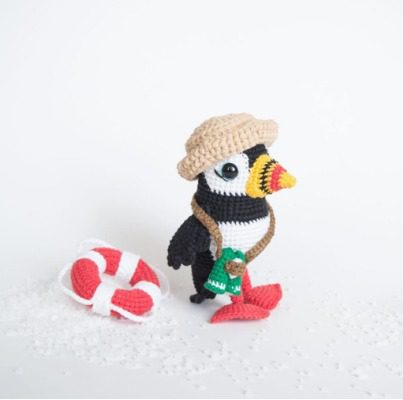
Crocheting an amigurumi puffin offers crafters the chance to create a charming representation of one of nature’s most distinctive seabirds. With their colorful beaks and tuxedo-like appearance, puffins make for irresistible crochet subjects. This comprehensive tutorial walks you through creating your own handmade puffin companion, perfect for gifting, decorating your home, or adding to your growing amigurumi collection.
What You Will Need for Your Puffin Amigurumi
Before beginning your puffin crochet journey, gather these essential supplies:
- Cotton Ricorumi yarn in black, white, orange, grey, and yellow
- Crochet hook size 2.5mm or 3mm
- Safety eyes for secure placement
- Yarn needle for assembly
- Polyester fiberfill for stuffing
- Black embroidery thread for details
- Stitch markers to track your progress
- Scissors for trimming
Essential Crochet Terms for Your Puffin Project
Understanding these common crochet terms will help you navigate the pattern with ease:
- Magic ring: The technique for starting crochet in the round with a tight center
- Chain: The foundation of crochet work, created by pulling yarn through loops
- Slip stitch: Used to join rounds or create flat connections
- Single crochet: The primary stitch used in amigurumi work
- Increase: Working two stitches in one stitch to expand your work
- Decrease: Combining two stitches into one to reduce width
- Round: A complete circuit around your crochet piece
Creating Your Puffin Step by Step
Head and Body Construction
The puffin’s head and body are worked as one continuous piece, with strategic color changes to create the distinctive puffin markings. Remember to stuff your amigurumi gradually as you work.
Using black yarn (designated as B in the instructions) and white yarn (designated as W):
Round 1: Create 6 single crochets in a magic ring (6 stitches total) Round 2: Increase in each stitch around (12 stitches total) Round 3: Work single crochet, increase repeatedly around (18 stitches total) Round 4: Work 2 single crochets, increase repeatedly around (24 stitches total) Round 5: Work 3 single crochets, increase repeatedly around (30 stitches total) Round 6: Work 2 single crochets, increase, 2 single crochets repeatedly around (36 stitches total) Round 7: Using black yarn for 10 single crochets, white yarn for 14 single crochets, black yarn for 12 single crochets (36 stitches total) Round 8: Using black yarn for 9 single crochets, white yarn for 16 single crochets, black yarn for 11 single crochets (36 stitches total) Round 9: Using black yarn for 8 single crochets, white yarn for 18 single crochets, black yarn for 10 single crochets (36 stitches total) Round 10: Using black yarn for 7 single crochets, white yarn for 20 single crochets, black yarn for 9 single crochets (36 stitches total) Round 11: Using black yarn for 8 single crochets, white yarn for 18 single crochets, black yarn for 10 single crochets (36 stitches total) Round 12: Using black yarn for 9 single crochets, white yarn for 16 single crochets, black yarn for 11 single crochets (36 stitches total) Round 13: Using black yarn for 10 single crochets, white yarn for 14 single crochets, black yarn for 12 single crochets (36 stitches total)
Switch completely to black yarn for the next section:
Round 14: Work 4 single crochets, decrease repeatedly around (30 stitches total) Round 15: Work 2 single crochets, increase, 2 single crochets repeatedly around (36 stitches total) Round 16: Work 5 single crochets, increase repeatedly around (42 stitches total) Round 17: Using black yarn for 14 single crochets, white yarn for 14 single crochets, black yarn for 14 single crochets (42 stitches total) Round 18: Using black yarn for 13 single crochets, white yarn for 16 single crochets, black yarn for 13 single crochets (42 stitches total) Round 19: Using black yarn for 12 single crochets, white yarn for 18 single crochets, black yarn for 12 single crochets (42 stitches total) Round 20: Using black yarn for 11 single crochets, white yarn for 20 single crochets, black yarn for 11 single crochets (42 stitches total) Round 21: Using black yarn for 10 single crochets, white yarn for 22 single crochets, black yarn for 10 single crochets (42 stitches total) Round 22: Using black yarn for 9 single crochets, white yarn for 24 single crochets, black yarn for 9 single crochets (42 stitches total)
At this point, insert the safety eyes between rounds 9 and 10.
Now you’ll create the tail extension: Round 23: Using black yarn, chain 5 (with the first single crochet in the second chain from the hook – mark this stitch as the beginning of the round), work 1 increase and 3 single crochets along the chain, then 8 single crochets; switch to white yarn for 26 single crochets; return to black yarn for 8 single crochets, 3 single crochets and 1 increase along the chain (52 stitches total) Round 24: Using black yarn for 5 single crochets, increase, 6 single crochets; white yarn for 28 single crochets; black yarn for 6 single crochets, increase, 5 single crochets (54 stitches total) Round 25: Using black yarn for 12 single crochets, white yarn for 30 single crochets, black yarn for 12 single crochets (54 stitches total)
Change to white yarn for the remaining rounds:
Round 26: Work 7 single crochets, decrease repeatedly around (48 stitches total) Round 27: Work 3 single crochets, decrease, 3 single crochets repeatedly around (42 stitches total) Round 28: Work 5 single crochets, decrease repeatedly around (36 stitches total) Round 29: Decrease 18 times around (18 stitches total)
At this point, stuff the body firmly, paying special attention to the tail and front to create a round belly.
Round 30: Work single crochet, decrease repeatedly around (12 stitches total) Round 31: Decrease 6 times to close the opening (6 stitches total)
Fasten off securely and weave in the end.
Crafting the Distinctive Beak
The puffin’s colorful beak is one of its most recognizable features:
Using orange yarn: Round 1: Create 5 single crochets in a magic ring (5 stitches total) Round 2: Increase in each stitch around (10 stitches total) Round 3: Work 10 single crochets around (10 stitches total)
Switch to white yarn: Round 4: Work single crochet, increase repeatedly around (15 stitches total)
Switch to grey yarn: Round 5: Work 15 single crochets around (15 stitches total)
Switch to yellow yarn: Round 6: Work 15 single crochets around (15 stitches total) Finish with 1 slip stitch
Fasten off, leaving a long tail for attaching to the head. Position the beak so the color change lines are at the bottom.
Creating the Legs
Make two identical legs:
Using orange yarn: Round 1: Create 5 single crochets in a magic ring (5 stitches total). Begin with a long tail to use later for attaching to the body. Rounds 2-5: Work 5 single crochets around for each round (5 stitches total)
Forming the Feet
Make two identical feet:
Using orange yarn: Round 1: Create 4 single crochets in a magic ring (4 stitches total) Round 2: Work single crochet, increase repeatedly around (6 stitches total) Round 3: Work single crochet, increase repeatedly around (9 stitches total) Rounds 4-5: Work 9 single crochets around for each round (9 stitches total)
For webbed toes, flatten each foot and crochet through both sides: single crochet, chain 2, single crochet in same stitch; repeat this sequence 3 times, finish with a slip stitch.
Adding the Wings
Make two identical wings:
Using black yarn: Round 1: Create 6 single crochets in a magic ring (6 stitches total) Round 2: Increase in each stitch around (12 stitches total) Round 3: Work 3 single crochets, increase repeatedly around (15 stitches total) Rounds 4-6: Work 15 single crochets around for each round (15 stitches total) Round 7: Work 3 single crochets, decrease repeatedly around (12 stitches total) Rounds 8-9: Work 12 single crochets around for each round (12 stitches total) Round 10: Work 2 single crochets, decrease repeatedly around (9 stitches total) Round 11: Work 9 single crochets around (9 stitches total) Round 12: Work single crochet, decrease repeatedly around (6 stitches total) Round 13: Work 6 single crochets around (6 stitches total)
Fasten off and close. Pull the end thread to the inside of the wing for attaching to the body. Position the bottom of each wing along the color change line on the body.
Assembly Tips for a Professional Finish
Creating a polished puffin requires careful assembly:
- Attach the beak centered on the face, between rounds 8-11, with the color changes positioned at the bottom.
- Secure the wings to the sides of the body, aligning the bottom edge with the color change line between the black and white sections.
- Attach the legs to the bottom of the body, positioned toward the front for balance.
- Connect the feet to the legs, angling them slightly outward for a natural stance.
- Add any final embroidery details to enhance facial expression.
Personalizing Your Puffin Creation
While following the pattern creates an authentic puffin, consider these variations:
- Add a tiny fish in the beak for a charming touch
- Create a small nest base from brown yarn
- Add a miniature scarf for a whimsical winter puffin
- Embroider small details like eyebrows for more expression
- Scale the pattern up or down by changing hook and yarn size
Why Puffins Make Wonderful Amigurumi Subjects
Puffins, with their distinctive coloration and charming appearance, translate beautifully into the amigurumi form. Their compact shape and recognizable features—the colorful beak, white face patch, and tuxedo-like body—create an instantly identifiable character even in crochet form.
Beyond their aesthetic appeal, puffins represent resilience and adaptability in nature. These remarkable seabirds navigate both sea and air with equal proficiency, making them symbols of versatility. By creating a puffin amigurumi, you’re crafting not just a toy but a representation of one of nature’s most endearing creatures.
The Joy of Amigurumi Crafting
The process of creating amigurumi brings multiple rewards. The meditative quality of crochet work offers stress relief and mindfulness. Each stitch becomes a moment of focus, temporarily setting aside daily worries. As your puffin takes shape, you’ll experience the satisfaction of bringing character and personality to simple yarn.
Amigurumi crafting also connects you to a global community of creators who share this passion. Whether you’re making this puffin for personal enjoyment, as a special gift, or to expand your crochet skills, the journey from yarn to finished creation offers rich rewards beyond the final product.
Caring for Your Finished Puffin
To ensure your amigurumi puffin stays looking its best:
- Spot clean with mild soap and water as needed
- Allow to air dry completely away from direct heat
- Display away from direct sunlight to prevent fading
- Gently reshape if necessary after cleaning
- Store in a dry, clean environment if not displaying
Check this out :Crochet Kido the Monster
Conclusion
Completing your amigurumi puffin brings the satisfaction of creating something truly special. Each stitch contributes to bringing this charming seabird to life in yarn form. Whether this is your first amigurumi project or your hundredth, the process of creating something by hand connects you to a timeless tradition of craftsmanship.
Your finished puffin represents more than just a crochet project—it embodies hours of focused creativity and skill. Display your creation proudly, gift it to someone special, or use it as inspiration for your next amigurumi adventure. Whatever you choose, your handcrafted puffin carries the unique imprint of its maker, making it truly one-of-a-kind.
Happy crocheting!
