

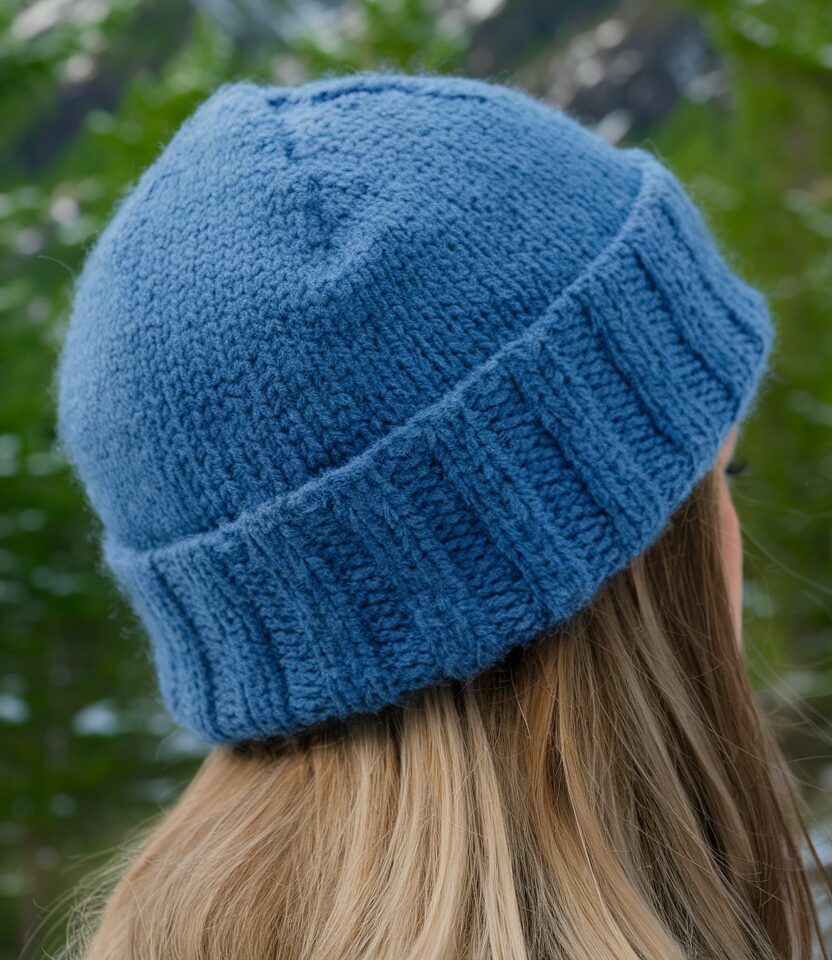
Looking for the perfect knit hat pattern that combines timeless style with cozy warmth? This classic cuffed beanie design is like the blue jeans of winter accessories—familiar, comfortable, and always in style. The double-stranded technique creates exceptional warmth for those truly cold days, while the simple construction makes it approachable for knitters at various skill levels.
What makes this knit hat pattern special is its versatility. Depending on your yarn choice, it can transform from an everyday casual accessory to a luxurious statement piece. The folded cuff adds extra ear protection and a polished look that complements any winter outfit.
Why Choose This Knit Hat Pattern?
This isn’t just any knit hat pattern—it’s designed with both practicality and style in mind. The double-stranded approach creates a fabric with beautiful drape and exceptional warmth that’s perfect for harsh winter climates. While you might wonder why not simply use bulky yarn instead, I’ve found that the texture and flexibility of double-stranded aran weight yarn creates a significantly better finished product.
The ribbed cuff provides a snug fit that won’t slip or ride up, while the stockinette body showcases whatever beautiful yarn you choose. The straightforward decreases create a naturally shaped crown that sits comfortably on the head.
Whether you’re making this for yourself (as I initially did with some gorgeous silk alpaca yarn from Australia) or as a gift for loved ones, this beanie will quickly become a cold-weather favorite.
Materials Needed for Your Knit Hat
Yarn:
- 2 skeins of Cascade Alpaca Pure (I used color 3032 Denim), or another aran weight yarn of your choice
- Note: You’ll be using two strands held together throughout the project
Needles:
- US size 6 (4.0mm) 16-inch circular needles for the ribbed cuff
- US size 7 (4.5mm) 16-inch circular needles for the main body
- US size 7 (4.5mm) double-pointed needles for crown decreases
Notions:
- 4 stitch markers (one different from the others)
- Yarn needle for finishing
- Small cloth bag (optional, for holding yarn balls while knitting)
Gauge and Sizing
Gauge: 4 stitches = 1 inch in stockinette stitch
Available Sizes:
- Small Adult: 20-inch circumference, 11 inches high
- Large Adult: 22-inch circumference, 12 inches high
Note: Instructions for the large size are shown in parentheses
Managing the Double-Stranded Technique
Working with two strands of yarn simultaneously can be tricky at first. Here are my tips for success:
First, decide how you want to prepare your yarn. You have several options:
- Wind both skeins into separate balls and use them together
- Pull from both the center and outside of a single ball
- Split each skein into two equal smaller balls using a kitchen scale
I’ve found that using a small cloth bag to hold both balls while knitting significantly reduces tangling issues. This simple trick has saved me countless hours of detangling frustration!
While you won’t need the entire amount of both skeins, I personally prefer having one larger leftover ball for my stash rather than two smaller ones. However, the preparation method is entirely up to your preference.
Step-by-Step Knit Hat Pattern Instructions
Casting On
Cast on 84 stitches for the small size or 92 stitches for the large size using the long-tail cast-on method with both strands of yarn held together.
Advanced Option: If you’re an experienced knitter seeking a more polished edge, consider using the Long Tail Tubular Cast On. This technique creates an exceptionally clean, elastic edge perfect for a ribbed cuff. Be aware that this method requires concentration and should ideally be completed in one sitting. For a 2×2 rib pattern, you’ll need an additional foundation row to properly arrange the stitches. Only attempt this if you enjoy technical challenges!
Joining and Creating the Cuff
- Join your stitches to work in the round, being careful not to twist them. Place a unique marker to indicate the beginning of your rounds.
- Using your size 6 (4.0mm) circular needles, work in 2×2 rib stitch (knit 2, purl 2) for 4 inches. This creates the folded cuff that makes this hat so cozy and classic.
Main Body of the Hat
- After completing the cuff, switch to your size 7 (4.5mm) circular needles while continuing to use both strands of yarn together.
- Begin working in stockinette stitch (knit every stitch when working in the round) until your hat measures 9 inches from the cast-on edge.
Shaping the Crown
Now comes the part that transforms your tube into a proper hat—the crown decreases. These strategically placed decreases create a smooth, rounded top:
- First Decrease Round:
- Knit 1 stitch
- SSK (slip one stitch knitwise, slip one stitch purlwise, insert left needle into the front of these two stitches and knit them together)
- Knit 16 stitches for small size or 18 stitches for large size
- K2tog (knit two stitches together)
- Place a marker (use markers that differ from your beginning-of-round marker)
- Repeat this pattern around the entire hat
- Complete one full round of knitting with no decreases
- Continue Decreasing:
- For each subsequent decrease round, maintain the same pattern but reduce the number of knit stitches between your SSK and K2tog by 2 stitches each round
- Knit one regular round between each decrease round
- Switch to double-pointed needles when your circumference becomes too small for circular needles
- Continue this decrease pattern until you have 12 (8) stitches remaining
- For the very last round, you may not have enough stitches for the full decrease pattern; if this happens, simply knit the center two stitches together in each section
Finishing Your Knit Hat
- Cut your yarn, leaving approximately an 8-inch tail for finishing.
- Thread your tail through a yarn needle, then pass it through all remaining stitches.
- Pull the tail snug to close the top of your hat, then bring the needle to the inside of the hat.
- Secure with a knot and weave in all ends neatly.
Styling Your Finished Knit Hat
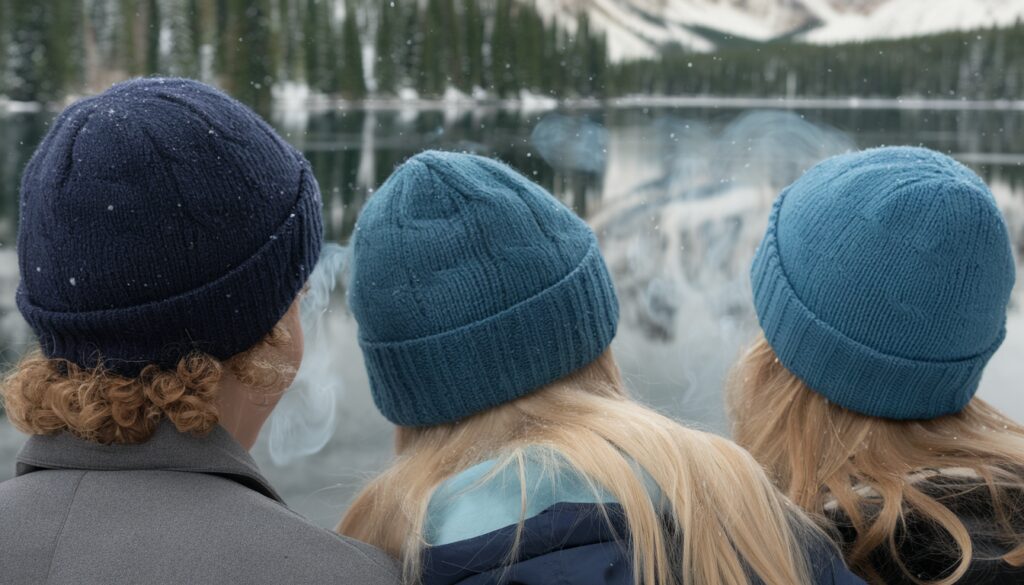
This versatile cuffed beanie can be styled multiple ways:
- Wear it with the cuff folded for maximum warmth and a classic look
- Leave the cuff unfolded for a slouchier style and extra length
- Push the hat back slightly for a more casual appearance
- Pull it down snugly for ultimate warmth in extreme conditions
The neutral design works with virtually any outfit, from outdoor gear to dressed-up winter ensembles.
Yarn Recommendations for Different Effects
While the pattern calls for Cascade Alpaca Pure, you can achieve different effects with alternative yarn choices:
For Ultimate Luxury:
- Merino-silk blends for drape and subtle sheen
- Baby alpaca for incredible softness and warmth
- Cashmere blends for indulgent comfort
For Everyday Durability:
- Wool-nylon blends for durability and easy care
- Superwash wool for machine-washable convenience
- Wool-alpaca blends for warmth with reduced pilling
For Unique Texture:
- Yarns with subtle color variations for dimension
- Tweedy yarns for visual interest
- Heathered colorways for sophisticated depth
Common Questions About This Knit Hat Pattern
How much yarn will I actually use? The pattern requires approximately 220-250 yards total when using two strands held together. This is why two skeins are recommended, though you likely won’t use the full amount.
Can I adjust the height of the hat? Absolutely! For a slouchier fit, add an extra inch or two to the stockinette section before beginning your decreases. For a more fitted beanie, you can reduce the stockinette section by up to an inch.
What if I don’t have double-pointed needles? You can use the magic loop method with a longer circular needle instead of double-pointed needles for the crown decreases.
Is this pattern suitable for beginners? If you can knit and purl, work in the round, and make basic decreases, you can successfully complete this hat. The most challenging aspect might be managing the two strands of yarn, but with a little practice, it becomes quite manageable.
Why This Knit Hat Pattern Works So Well
The secret to this hat’s success lies in its thoughtful construction. The 2×2 ribbing creates significant stretch and elasticity while providing excellent structure for the folded cuff. The double-stranded technique adds substantial warmth without sacrificing flexibility or creating a stiff fabric.
The crown decreases are spaced perfectly to create a rounded top that fits comfortably on the head without any pointy corners or awkward shaping. The finished hat has a timeless silhouette that flatters virtually everyone.
Best of all, despite its professional appearance, this knit hat pattern works up relatively quickly due to the heavier gauge of the doubled yarn. It’s perfect for gift-giving or creating a new accessory for yourself when the weather turns cold.
Whether you’re an experienced knitter looking for a reliable go-to pattern or a newer knitter ready to try your first hat, this classic cuffed beanie delivers beautiful results every time. Happy knitting!
